TK-358: 3 is for Three Pears by Paul Cezanne
Season 3 Episode 321 | 14m 9sVideo has Closed Captions
Join Mrs. Readwright at Camp Discovery!
Transitional Kindergarten teacher, Mrs. Readwright, welcomes students back to Camp Discovery, a fun learning space packed with reading adventures & fun games!
Problems playing video? | Closed Captioning Feedback
Problems playing video? | Closed Captioning Feedback
Reading Explorers is a local public television program presented by Valley PBS
TK-358: 3 is for Three Pears by Paul Cezanne
Season 3 Episode 321 | 14m 9sVideo has Closed Captions
Transitional Kindergarten teacher, Mrs. Readwright, welcomes students back to Camp Discovery, a fun learning space packed with reading adventures & fun games!
Problems playing video? | Closed Captioning Feedback
How to Watch Reading Explorers
Reading Explorers is available to stream on pbs.org and the free PBS App, available on iPhone, Apple TV, Android TV, Android smartphones, Amazon Fire TV, Amazon Fire Tablet, Roku, Samsung Smart TV, and Vizio.
Providing Support for PBS.org
Learn Moreabout PBS online sponsorshipMore from This Collection
Valley PBS and Fresno Unified School District have partnered with Golden 1 Credit Union to create Reading Explorers Lessons for grades Pre-Kindergarten through Third grade. The daily lessons will be taught by Fresno Unified School District teachers and are created to help students practice their reading skills and reinforce lessons during distance learning.
Video has Closed Captions
Valley PBS presents Reading Explorers Lessons for Pre-Kindergarten and TK. (26m 27s)
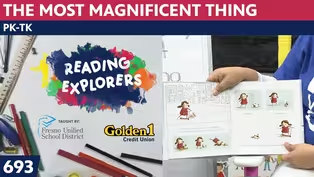
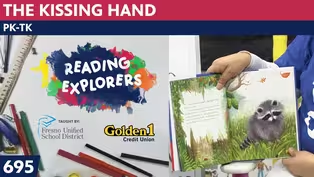
PK-TK-693-The Most Magnificent Thing
Video has Closed Captions
Valley PBS presents Reading Explorers Lessons for Pre-Kindergarten and TK. (26m 26s)

Video has Closed Captions
Valley PBS presents Reading Explorers Lessons for Pre-Kindergarten and TK. (26m 28s)
Video has Closed Captions
Valley PBS presents Reading Explorers Lessons for Pre-Kindergarten and TK. (26m 28s)
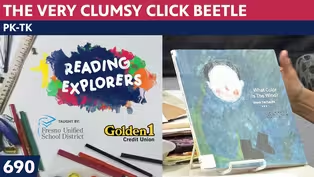
PK-TK-690: The Very Clumsy Click Beetle
Video has Closed Captions
Valley PBS presents Reading Explorers Lessons for Pre-Kindergarten and TK. (26m 22s)
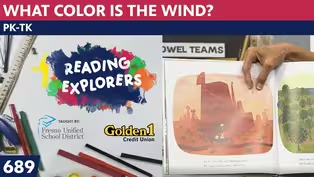
PK-TK-689: What Color is the Wind?
Video has Closed Captions
Valley PBS presents Reading Explorers Lessons for Pre-Kindergarten and TK. (26m 21s)
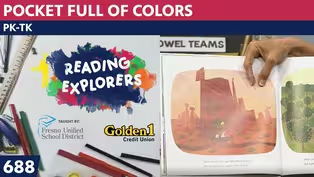
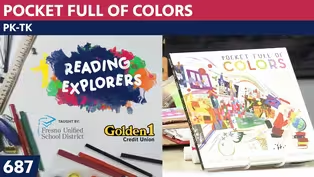
PK-TK-688: Pocket Full of Colors
Video has Closed Captions
Valley PBS presents Reading Explorers Lessons for Pre-Kindergarten and TK. (25m 58s)
PK-TK-687: Dancing Through Fields of Colors
Video has Closed Captions
Valley PBS presents Reading Explorers Lessons for Pre-Kindergarten and TK. (26m 20s)
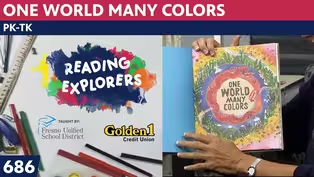
PK-TK-686: One World Many Colors
Video has Closed Captions
Valley PBS presents Reading Explorers Lessons for Pre-Kindergarten and TK. (27m 13s)
PK-TK-685: School is Wherever I am
Video has Closed Captions
Valley PBS presents Reading Explorers Lessons for Pre-Kindergarten and TK. (26m 32s)
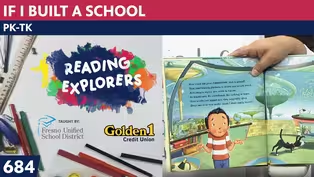
PK-TK-684: If I Built a School
Video has Closed Captions
Valley PBS presents Reading Explorers Lessons for Pre-Kindergarten and TK. (26m 21s)
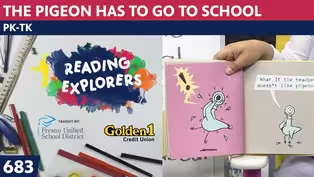
PK-TK-683: The Pigeon Has to Go to School
Video has Closed Captions
Valley PBS presents Reading Explorers Lessons for Pre-Kindergarten and TK. (26m 22s)
Providing Support for PBS.org
Learn Moreabout PBS online sponsorship♪ Good morning to a brand new day ♪ ♪ Time to learn and games to play ♪ ♪ Learning things is so much fun ♪ ♪ Learning is good for everyone ♪ (upbeat music) (playful music) - Hello, early learners, and welcome back to the art room.
We are doing the one, two, threes of art.
Let's start out with our hello song.
♪ Hello, nice to see you, everyone ♪ ♪ Hello, nice to see you, everyone ♪ ♪ Hello to you, hello to you ♪ ♪ Hello to you, hello to me ♪ ♪ Hello, nice to see you, everyone ♪ Well, we've done one zebra, two Pez dispenser with the crown and the dino, today is three pears.
Let's sing the song and see what we find out.
♪ One, two, three, four, five of art ♪ ♪ That's the way that we will start ♪ ♪ One is for zebra ♪ ♪ Two is for Pez ♪ ♪ Three is pear, that's what Cezanne says ♪ ♪ Four is for hearts painted by Jim Dine ♪ ♪ That is art and the number line ♪ Well, let's take a look at Paul Cezanne.
We talked about him when we did all of that art study about apples.
We've also done his study where we learned how he liked to use geometric shapes.
And here he is, Paul Cezanne.
He'd grown up and his family wanted him to be an attorney, if you remember, and be a lawyer, and he was a French draftsman and a painter, and he liked to do groupings of objects with odd numbers.
And this is one of his monochromatic pieces, and monochromatic means one color.
It's one color that can be mixed with other colors, like you can see, this is a light green, it looks like they mixed it with some yellow.
There's some darker green as the shadows.
This is the one that I want to imitate.
I want to be inspired by this shape of the pear, and have the light colors on this side 'cause that's where the light is coming from, and make the darker green down the side.
I will probably put a stem on and find some colors that will match that.
But I'm also going to do the background with magazine papers that just have writing on them, which is unusual to do for our art.
But let's move this down, get this set aside, and get started with our art.
I hope last night you got into some magazines and got out some colors of green.
And I told you I was going to use light green and dark green, and I also am going to use the words as my background.
Now, I poured this all out on my lap so I don't have to dig in the envelope, but I'm going to put these up here so I can find them easier when I pick up my table.
I'm going to be using some liquid glue, and the liquid glue is just glue that I've put water in with so that it can be glued down, and the nice thing about it is as it dries, it gets real shiny.
I told you on Monday how I prepare my paper, and I made the blackout line so it looks like it's in a frame.
I brought a pencil with me, but I also brought a yellow pencil, so that only I could see the outline of the pear.
I'm going to move the pear down so that I can see the shape, and we can kind of be inspired by that art.
I'm gonna put it right on top of all my colors of green, because I want to see.
The top of the pear...
I'm gonna turn it to you while we talk about the shape.
The top of the pear is slimmer than the bottom.
Like people sometimes say, "Oh I've got a pear-shaped body," because they're smaller on the top and larger on the bottom.
So here's a curve line at the top, and it goes in a little bit and down for a big curve on the bottom.
So it really ends up being a circle and an oval shape married together.
So let me show you this.
I'm going to start at the top.
Maybe I'll use the pencil so you can see it.
I'm not gonna use the black pen, though.
I'm going to go curve down, and where the stem is, I'll do a curve line up.
Straight over, curve line to match it up.
I'll go down, so you see there is the slimmer part of the pear.
And then I'm going to go out for its kind of bigger bottom part of its body.
I don't necessarily need to erase, but I want you to see how that looks.
I think that looks pretty good.
I'm gonna remember, I need to do dark here.
And I know that the shadow is going to be over on this side with darker green.
So when I put my paper in here is where the light green, and then even put a little piece of darker green here and here as a shadow.
Maybe that's where the pear curves out.
So I'm going to put this up here, my glue, watered down in a little jar.
I've I kept it for weeks it's been in there, and it hasn't dried out because I found a place that has a good lid.
So now the glue is in there.
Watch what I do.
I'm going to put some glue inside the pear shape where the light green is going to go.
And you can see, here's a piece of my magazine, I'm gonna tear off that little dark part.
I just tore it out of the magazine, and now I'm going to lean it up against here so it matches that and press it down.
When I'm all finished gluing things on, then I can go around and put glue on top so that it looks shiny.
I found an old apple in there, and I'm gonna put some of that light color in the middle.
Maybe right around there.
Oh, that sounds good.
So I use my old brush.
Now, remember, if you use glue on your brushes, be sure at the end of the project to wash it, because the glue will make the bristles all stick together, and every time you go to use it then, it will be stuck together and you'll wonder, "How can I paint things?"
Oh, look, I found this green.
It's just salad, and it has some avocados in there.
So that would look good in here too.
There's still a little glue from the last time I glued on it.
There, and it just makes itself a little collage of colors.
I like this piece of avocado a little darker too.
I have to remember to find some green that's darker for my shadows.
Then I'm going to continue to add colors along here, and as you do this too, think about, oh, stay away from that area, because I'm going to put darker green over there.
Maybe I'll do it right now so you can see what I'm talking about.
Even if there's words on here, that's okay, because this kind of collage is just great for adding words, and sometimes people use a collage and they have fabric even on it.
There, I'll put that darker green over here.
I still need more light green, and I liked that apple color.
So I think I'll get over there and use some of it.
You don't have to do cutting with scissors, because the scissors make the edges all nice and smooth, and we really want with our collage to have some ragged edges.
And you notice I'm not putting the exact same color next to each other, so it makes it into an interesting combination of colors.
Oh, here's some broccoli.
That's some good green that I can put on that shadowy side.
Or maybe I'll put the top of the floweret on this part that I wanted to do darker.
When I put that one down, I didn't really put much glue on it, I better.
You don't wanna add too much and make your paper too soupy, 'cause then it won't dry and it will be all curly.
Oh, this is the part.
These are all the ones I kept together that I'm going to use for the background.
I'll put them under here so I don't get them mixed up with my colors.
If you don't have magazines, you could just use the side of a crayon, and rub it on its side inside the pear shape.
Because if you don't have magazines, or you don't know where any magazines are, or if you can go to the grocery store and the ads come out, there'll be lots of green pieces of paper in the ads.
Do I really want... Oh, there's a nice lime green.
That's gonna be a goodie.
Gonna tear that one, and some of my pieces are bigger than others, but I don't want it too big, 'cause then it doesn't look very collage-like, and I like the look of the collage.
Put it on top and overlap it, get the edges down with just a little gluing it.
Gonna put a little more glue here, 'cause then I can add more of this lime green.
This lime green is kind of nice, and it's solid.
It's looking more and more like a pear shape to me.
Curving it, gonna put this piece down here.
See how I curve cut, ripped that so it goes right along that curve?
Oopsie, I got that one a little wet and didn't do the edges, so it tried to pop back up.
A little more, you can tell I really found this one to be my favorite green, 'cause I keep going back to it, but I better put it up here so it's not exactly like the one next to it.
A collage is kind of nice, 'cause you don't really have to think about much else, but what you're doing, just a little tearing, just a little gluing.
This is gonna be so pretty when I finish with it.
Do you think I will finish it today?
Probably not, 'cause the background is gonna take some doing.
Maybe I'll show you what I'm going to do so we don't run out of time, and I haven't shown you.
I just find some places that have words, just black and white, and I put it inside my frame.
If you didn't make a frame, just put it near the edge of your paper.
See how I'm putting it up there, but not putting it on my line?
Okay.
Here's some that's kind of bluish in the background.
All my words are right here.
You can cut this out, put it on there.
And then when I bring it back and you'll say, "Oh I'm so glad Ms. Readwright finishes her work and shows us what it looks like when she's finished."
Because I know I run out of time, but lots of you that are doing this in school, oh, I went to Miss Damian's class yesterday to take her a little present, and I got to see three of my artists.
I had Nolan, Davina.
They have sent me art before and I got to see them in their classroom, and they were working with Mrs. Damian.
It was so fun to see artists at work.
Boys and girls, you know I have one pear, even though we're looking at Cezanne's three pears, but tomorrow, we know after number three comes number four, and what I'm doing tomorrow is Jim Dine does these really colorful hearts.
And we're going to make hearts with Jim Dine's work as our inspiration, and what you'll need to bring is white paper and scissors.
You'll need a pencil.
I'm bringing watercolors.
I want you to bring a brush and some water and a black pastel, because we're going to be rubbing the pastel like we did with the fish with clay.
So we're going to make one heart, but you could make four later, I suppose.
But it's going to be a great project, but you absolutely need something with black on it.
All right, so let's say goodbye to one another by singing our "Goodbye, see you next time," ready?
♪ Goodbye, see you next time, everyone ♪ ♪ Goodbye, see you next time, everyone ♪ ♪ Goodbye to you, goodbye to you ♪ ♪ Goodbye to you, goodbye to me ♪ ♪ Goodbye, see you next time, everyone ♪ Boys and girls, I'll see you tomorrow.
Four hearts with Jim Dine.
Bye-bye.
(upbeat music) ♪ Good morning to a brand new day ♪ ♪ Time to learn and games to play ♪ ♪ Learning things is so much fun ♪ ♪ Learning is good for everyone ♪ (upbeat music)


Support for PBS provided by:
Reading Explorers is a local public television program presented by Valley PBS