TK-378: Painting with scissors with Charley Harper
Season 3 Episode 439 | 14m 14sVideo has Closed Captions
Join Mrs. Readwright at Camp Discovery!
Transitional Kindergarten teacher, Mrs. Readwright, welcomes students back to Camp Discovery, a fun learning space packed with reading adventures & fun games!
Problems playing video? | Closed Captioning Feedback
Problems playing video? | Closed Captioning Feedback
Reading Explorers is a local public television program presented by Valley PBS
TK-378: Painting with scissors with Charley Harper
Season 3 Episode 439 | 14m 14sVideo has Closed Captions
Transitional Kindergarten teacher, Mrs. Readwright, welcomes students back to Camp Discovery, a fun learning space packed with reading adventures & fun games!
Problems playing video? | Closed Captioning Feedback
How to Watch Reading Explorers
Reading Explorers is available to stream on pbs.org and the free PBS App, available on iPhone, Apple TV, Android TV, Android smartphones, Amazon Fire TV, Amazon Fire Tablet, Roku, Samsung Smart TV, and Vizio.
Providing Support for PBS.org
Learn Moreabout PBS online sponsorshipMore from This Collection
Valley PBS and Fresno Unified School District have partnered with Golden 1 Credit Union to create Reading Explorers Lessons for grades Pre-Kindergarten through Third grade. The daily lessons will be taught by Fresno Unified School District teachers and are created to help students practice their reading skills and reinforce lessons during distance learning.
Video has Closed Captions
Valley PBS presents Reading Explorers Lessons for Pre-Kindergarten and TK. (26m 27s)
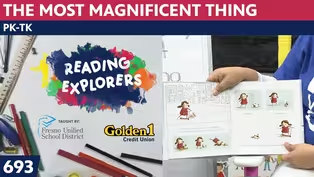
PK-TK-693-The Most Magnificent Thing
Video has Closed Captions
Valley PBS presents Reading Explorers Lessons for Pre-Kindergarten and TK. (26m 26s)

Video has Closed Captions
Valley PBS presents Reading Explorers Lessons for Pre-Kindergarten and TK. (26m 28s)
Video has Closed Captions
Valley PBS presents Reading Explorers Lessons for Pre-Kindergarten and TK. (26m 28s)
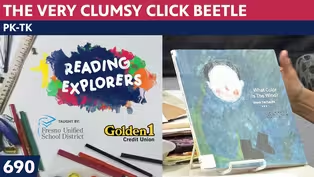
PK-TK-690: The Very Clumsy Click Beetle
Video has Closed Captions
Valley PBS presents Reading Explorers Lessons for Pre-Kindergarten and TK. (26m 22s)
PK-TK-689: What Color is the Wind?
Video has Closed Captions
Valley PBS presents Reading Explorers Lessons for Pre-Kindergarten and TK. (26m 21s)
PK-TK-688: Pocket Full of Colors
Video has Closed Captions
Valley PBS presents Reading Explorers Lessons for Pre-Kindergarten and TK. (25m 58s)
PK-TK-687: Dancing Through Fields of Colors
Video has Closed Captions
Valley PBS presents Reading Explorers Lessons for Pre-Kindergarten and TK. (26m 20s)
PK-TK-686: One World Many Colors
Video has Closed Captions
Valley PBS presents Reading Explorers Lessons for Pre-Kindergarten and TK. (27m 13s)
PK-TK-685: School is Wherever I am
Video has Closed Captions
Valley PBS presents Reading Explorers Lessons for Pre-Kindergarten and TK. (26m 32s)
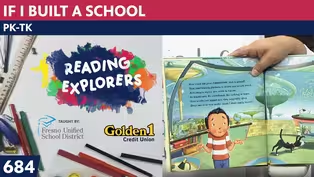
PK-TK-684: If I Built a School
Video has Closed Captions
Valley PBS presents Reading Explorers Lessons for Pre-Kindergarten and TK. (26m 21s)
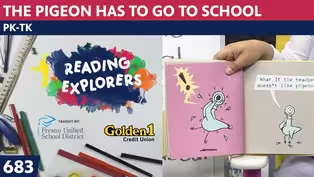
PK-TK-683: The Pigeon Has to Go to School
Video has Closed Captions
Valley PBS presents Reading Explorers Lessons for Pre-Kindergarten and TK. (26m 22s)
Providing Support for PBS.org
Learn Moreabout PBS online sponsorship♪ Good morning to a brand new day ♪ ♪ Time to learn and games to play ♪ ♪ Learning things is so much fun ♪ ♪ Learning is good for everyone ♪ (upbeat music) - Hello, early learners.
And welcome back to the art room where we are studying artist, Charley Harper.
Let's start off with our hello song.
♪ Hello, nice to see you, everyone ♪ ♪ Hello, nice to see you, everyone ♪ ♪ Hello to you ♪ ♪ Hello to you ♪ ♪ Hello to you ♪ ♪ Hello to me ♪ Hello, nice to see you, everyone Well, Monday we learned the Cardinal.
Tuesday, we learned the Robin.
I forgot to play the sound for you, but I'm going to play the sound that the bird for today makes.
And I wrote about his sound in the song, because it's not a song really that this bird makes.
It's more of a sound.
So let's take a look.
It is the owl.
Have you seen owls before?
If you get to go out to Kearney Park, they are up in the trees there, many in the palm trees and they eat little animals at night.
They swoop down and get them.
They eat them whole, and in their stomach all the bones and the fur go.
And then they throw that up and it looks like a little cotton oval at the bottom of the tree.
If your family takes you there they can pick it up with some kind of tweezer or a tong, and you can open it up and see all the bones inside.
Or maybe your teacher will do it with you.
I used to do it every year.
I used to microwave it so if anything was bad on it, it would kill it.
But we would open it up and you can put together the little mouse's body using the bones.
Kind of crazy, isn't it.
Let's take a look at the owl for today.
And here it is.
When I first saw Charley Harper's owl, it was many of them and they made a heart shape when he had them facing forward.
But we're going to have it standing sideways, and they have different feet than the ones he puts on all of his songbirds.
It's a straight line, and then it's a half moon, and a half moon.
So because their talons are very sharp when they go down to hunt.
But here is the song I wrote about the owl.
♪ Whose eyes are those ♪ ♪ The eyes are round as rings ♪ ♪ A watchful owl lets out a sound instead of songs to sing ♪ So I'm going to use my little song book, and it says that the owl is on number 18.
So I got it set up, and I'll put it up kind of near my microphone.
Listen.
(owl hoots) That is the owl's hoot hoot hoot.
And when you hear it, if you're ever walking around a park, you can hear them at night.
I know when I backpack at night and I hear that hoot owl, I think, Oh, I wonder if we'll see it, because you barely hear it.
It's wings are so feathered at the end of the feathers that they hardly make a sound at all.
The birds of prey, when they fly, you can barely hear their wings, because they sneak up on the animals they plan to eat.
All right, I wanted to tell you these facts about Charley Harper and then we'll start on our project.
It says that he was a wildlife artist who used a combination of the geometric forms.
But one time when he was asked to describe his simple art, 'cause people said, "Oh, his art's so simple."
He said, "When I look at wildlife or nature subjects, I don't see the feathers in the wings.
I just count the wings."
So he's telling them he likes to make things simple, because that's the way that he thinks nature is.
So let's pick up the table, take a look at the shape.
I made a background of gray, just like Charley Harper did.
His gray is a little more bluish gray.
Mine's more of a brownish gray.
But I can see that it starts up just like a thumb again.
We're going to go up and curve.
I can make it back down and then make it's body curve.
Watch what I mean by that.
I can use this whole sheet of paper.
Get off of there, little scrap.
And I might make it symmetrical, by I'm not gonna fold my paper.
I'm just gonna hold my pieces together.
If you have a paper clip and wanna put it on there.
For children it might be a little harder than for a grownup who just had a big birthday.
Well, there.
Easy as that.
I just cut off the two corners.
And if you don't want them to be symmetrical and exactly the same on one side as the other, then what you can do is just curve off the corners.
That's okay.
Now we know the front of his body isn't this shape.
So, but I wanted to see how I would put the front part of his feather.
And what I decided was this.
I would make it at an angle and mark it with my pencil how far up I wanted those feathers to go.
And what I will do is curve it to make it that way.
And I will make it curve that way so that when I cut the front part off, it will work out.
Again, I want it to be symmetrical, so I am cutting it like this, and cutting its chest feathers like that.
That way I can put it on the edge of this paper and maybe it needs to be more curved.
I think I will do it more curved.
Now notice I'm not measuring it or anything.
I hope it looks symmetrical.
And what I'll do is this, curve it and see how far up it will go.
There.
Now I'll just put the glue on that white part, and move it around, arrange it, and rearrange it.
If you wanna just cut out a little wing shape or a leaf shape to just put on yours, you can do that.
And it might even be easier.
I should probably just follow my own direction and do that.
I'll just cut out like a leaf shape, and hope that that will make it good.
Just cut it out.
I'm trying to find ways that doesn't make this so hard to cut out, 'cause I don't want anyone to get frustrated and say, "Oh, this art projects too hard.
I'm not having fun."
I made it too big, so I'm gonna cut part of it.
See how I arranged it.
And now I'm rearranging it, cutting off this part.
I'll put it on here, and see if that's a better size.
Much better, but I still need to move it up a little bit.
Put the edge on there.
There we go.
Now watch what I do.
I cut off this part that I don't need.
And now he has his body.
It still looks pretty big.
I wonder if I would like to make it curved up a little more.
Let me go up and curve it.
I think that's a little better, because his eyes are round as rings.
And what I thought interesting that happened, remember when we studied Monet, and Monet had that water lily?
That's kind of what I thought that the owl's face was like.
So I'm gonna see how much I need on there.
I'll make a little fold in the paper.
That's how big his face is going to be.
I'll make it into a rectangle, and see if that's how big the face will be.
Put it on here.
I made it a little too wide, so I'll snip a little bit more.
And I say, that looks about right.
So in order to make it symmetrical, I will do this, and make it like a little heart shape, but don't make it into the point.
Just go down and make it into like the water lily shape.
There, that looks pretty good.
So I'll put the glue on that.
I'll turn it so you can see what I've done so far, and see if it looks like something that you will make it like that too.
So here it is.
Here he is.
And here's our inspiration.
See if it looks pretty much like that, and think, "Hey, Miss Readwright, you're really doing it."
Now, I have a couple of brown tools here that I brought.
I brought a brown pen so I can make the separation between his two eyes come down.
You could use a brown crayon.
You could use a brown pastel, but I'm using this.
I have to turn it, boys and girls, to see how far down I want my beak.
So I know I will draw two dots for the eyes, and try and make them the same size.
If one got a little bigger, I'll just make this one a little bigger when I color it in.
So there.
And I'm coloring it in so that I then make it permanent.
Color in the big round eyes, as round as rings.
Now the beak comes down below that brown line, so I'm gonna put a dot here.
And I will go from the outside ring to that.
And from the outside, ooh, this one's going to do inside this one, that way and make the beak go across.
Now, look.
He put polka dots.
I almost tried to be Yayoi Kusama and say, "she," but he put polka dots, 'cause the feathers are polka dotted in places on the owl.
And you'll find, if you go to Kearney Park, and you want to find those pellets, the owl pellets, you'll find polka dotted feathers too.
Now down here, starting at the corner of my brown paper, I'm gonna move it off of my gray, so I don't do that.
And I'm going to make it's curved wing.
It'll come up and stop there.
Now the thing about this wing, it needs things to make it look like it has feathers.
So I'll make them, I could either use my ruler, which I'm not wild about using.
I like it better to use a straight edge.
So what I could use is just a piece of paper that I have.
Because, for me, I get so much ink on the ruler that it makes it have a smear mark, and I don't like the smeary part.
So if you want to just draw it free hand, free hand means not using a ruler or a straight edge, and I can just do do this.
Now along the edge, he also made these feathers have polka dots.
So he put a couple polka dots here and there.
They don't have to be exactly spaced apart in any certain order.
You just think what looks good for your feathers.
Now the other thing about this, is he has little pieces of black around.
I'm not really sure why, but I'm gonna put these on here too, just little marks that make it look, was it because he had ink on his hand and he made it do that?
I don't know, but I think that my owl is looking pretty good.
So I think I'm gonna put it on my paper and add those feet that I told you were for hunting.
So remember when you add your glue to the back of your paper, that you get all around the edges.
That's what works best.
Because if it pops off, you can always glue it back on, but it's better just to make it so that it doesn't pop off in the first place.
Let me put it on my paper, and then I'll turn it to you and show you how I'm going to do the feet.
I'll do one foot while it's facing me, and then I'll pass it on to you and let you see how it comes out from these white feathers here.
And then it's a half moon shape with another one inside.
So I will show you.
Ooh, I think I didn't do that exactly right, 'cause the other toe is hanging off the edge.
You're supposed to make them both the same.
So I'm going to make this one, and make it go the same way across from that, touch and down.
And the next one has to go up, and touch and down.
There we go.
So there's my owl.
And I also like to make a frame around.
Remember how I taught you?
I'm just going to use this as my straight edge.
You'll see how nice it looks when it has a little edge on it.
Get this one over here.
Shall we sing goodbye to one another?
♪ Goodbye, see you next time, everyone ♪ ♪ Goodbye, see you next time, everyone ♪ ♪ Goodbye to you ♪ ♪ Goodbye to you ♪ ♪ Goodbye to you ♪ ♪ Goodbye to me ♪ ♪ Goodbye, see you next time, everyone ♪ Goodbye, boys and girls.
(upbeat music) ♪ Good morning to a brand new day ♪ ♪ Time to learn and games to play ♪ ♪ Learning things is so much fun ♪ ♪ Learning is good for everyone ♪ (upbeat music)


Support for PBS provided by:
Reading Explorers is a local public television program presented by Valley PBS