TK-385: The Owl
Season 3 Episode 481 | 14m 3sVideo has Closed Captions
Join Mrs. Readwright at Camp Discovery!
Transitional Kindergarten teacher, Mrs. Readwright, welcomes students back to Camp Discovery, a fun learning space packed with reading adventures & fun games!
Problems playing video? | Closed Captioning Feedback
Problems playing video? | Closed Captioning Feedback
Reading Explorers is a local public television program presented by Valley PBS
TK-385: The Owl
Season 3 Episode 481 | 14m 3sVideo has Closed Captions
Transitional Kindergarten teacher, Mrs. Readwright, welcomes students back to Camp Discovery, a fun learning space packed with reading adventures & fun games!
Problems playing video? | Closed Captioning Feedback
How to Watch Reading Explorers
Reading Explorers is available to stream on pbs.org and the free PBS App, available on iPhone, Apple TV, Android TV, Android smartphones, Amazon Fire TV, Amazon Fire Tablet, Roku, Samsung Smart TV, and Vizio.
Providing Support for PBS.org
Learn Moreabout PBS online sponsorshipMore from This Collection
Valley PBS and Fresno Unified School District have partnered with Golden 1 Credit Union to create Reading Explorers Lessons for grades Pre-Kindergarten through Third grade. The daily lessons will be taught by Fresno Unified School District teachers and are created to help students practice their reading skills and reinforce lessons during distance learning.
Video has Closed Captions
Valley PBS presents Reading Explorers Lessons for Pre-Kindergarten and TK. (26m 27s)
PK-TK-693-The Most Magnificent Thing
Video has Closed Captions
Valley PBS presents Reading Explorers Lessons for Pre-Kindergarten and TK. (26m 26s)

Video has Closed Captions
Valley PBS presents Reading Explorers Lessons for Pre-Kindergarten and TK. (26m 28s)
Video has Closed Captions
Valley PBS presents Reading Explorers Lessons for Pre-Kindergarten and TK. (26m 28s)
PK-TK-690: The Very Clumsy Click Beetle
Video has Closed Captions
Valley PBS presents Reading Explorers Lessons for Pre-Kindergarten and TK. (26m 22s)
PK-TK-689: What Color is the Wind?
Video has Closed Captions
Valley PBS presents Reading Explorers Lessons for Pre-Kindergarten and TK. (26m 21s)
PK-TK-688: Pocket Full of Colors
Video has Closed Captions
Valley PBS presents Reading Explorers Lessons for Pre-Kindergarten and TK. (25m 58s)
PK-TK-687: Dancing Through Fields of Colors
Video has Closed Captions
Valley PBS presents Reading Explorers Lessons for Pre-Kindergarten and TK. (26m 20s)
PK-TK-686: One World Many Colors
Video has Closed Captions
Valley PBS presents Reading Explorers Lessons for Pre-Kindergarten and TK. (27m 13s)
PK-TK-685: School is Wherever I am
Video has Closed Captions
Valley PBS presents Reading Explorers Lessons for Pre-Kindergarten and TK. (26m 32s)
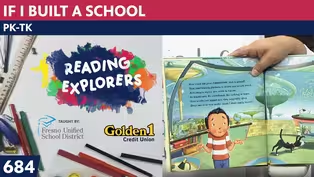
PK-TK-684: If I Built a School
Video has Closed Captions
Valley PBS presents Reading Explorers Lessons for Pre-Kindergarten and TK. (26m 21s)
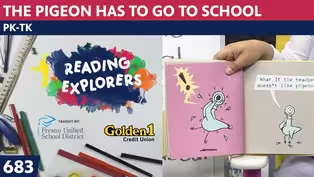
PK-TK-683: The Pigeon Has to Go to School
Video has Closed Captions
Valley PBS presents Reading Explorers Lessons for Pre-Kindergarten and TK. (26m 22s)
Providing Support for PBS.org
Learn Moreabout PBS online sponsorship♪ Good morning to a brand new day ♪ ♪ Time to learn and games to play ♪ ♪ Learning things is so much fun ♪ ♪ Learning is good for everyone ♪ (upbeat music) - Hello, early learners, and welcome back to the art room.
It's me, Mrs. Readwright.
We have been talking about birds all week, and we did a different bird each day, and today we are talking about the owl.
As soon as I said, owl, what did you think of?
Did you think, "Oh, it's the bird that hunts at night?
Oh, it's the bird that has the big eyes.
Oh, it's the bird who can practically turn its entire head around in a circle."
It's a hunter of small mammals.
Oh, it even eat snakes.
I mean the owl will eat a lot of different things, and there are so many kinds of owls.
I was studying up and thinking, "Well what can I tell them about?
Can I tell them about the one that has feathers that stick up and they call it a horned owl?"
But it doesn't really have horns, but it looks like it.
The owl that I used today for our project kind of looks like a snowy owl, but it's going to be decorated, and it's going to have wings that really move, if you have a brad.
If you don't, you'll just glue your wings to it.
And I made two wings, one kind of smaller and slimmer in the front and one in the back.
And I'll show you.
I made one so that you can see how it is put together.
But, let's sing our hello song before we get started.
♪ Hello, nice to see you, everyone ♪ ♪ Hello, nice to see you, everyone ♪ ♪ Hello to you ♪ ♪ Hello to you ♪ ♪ Hello to you ♪ ♪ Hello to me ♪ ♪ Hello, nice to see you, everyone ♪ Now, this owl is called articulated.
I know that's a big word, but it really just means that it's a moveable piece, and it kind of could be some kind of puppet if you could figure out how to hook a straw to the wings and make it stand up while holding the body up.
And they're all different shapes that you can do.
And like I told you before, as an art teacher, I don't give a shape for you to trace.
You just have to look at it.
When I was looking at it, I thought, "Hey, the body looks like a flip-flop."
And I thought I can draw a flip-flop.
A flip-flop's just an old shoe shape.
And then it has, the wings are just teardrops, one's bigger and one smaller.
But let's take a look.
I wrote a little song about the owl and it goes like this.
♪ Who flies around in the dark of night ♪ ♪ Who glides on wings over silent night ♪ ♪ Who eats his dinner by late moonlight ♪ ♪ It's the owl with his sharp eyesight ♪ And the owl does have a sharp eyesight.
Something that's super interesting I think about owls, they have to be quiet in order to catch their prey.
So they hunt for it and they look down below and any movement they see, they keep their eyes on it.
Their feathers are so fine on the edges.
You can't even hear their wings.
They fly silently.
And then they just dart down to get the animal that they've decided is what they're going to have to eat.
And I'll show you.
I picked a light color paper to do my owl so that you could see the parts that I painted on it.
But you can do a dark one and just use your pastels or use darker colored pencils.
You decide, because you can just pick and make a bunch of them.
This is my third one I made.
I made a blue and white one.
I made a red and white one and put hearts and things on it, like a Valentine.
But today, the one I made over the weekend, it's pink, and I used oranges and magentas to make it colorful.
So I'll show you what it looks like.
And then we'll decide how we're going to cut it out and make it.
So here are my three pieces.
Oh, I'll pick my whole table up.
Here are my three pieces that I'm using for my owl.
Here's the part I told you kind of looks like a flip-flop with a little tail on, a triangle tail.
And you can see I made it have this little part that this owl has.
It's like a little widow's peak.
I made it's beak that is sharp for eating meat.
I put the eyes and then put kind of like sunbursts around them.
I made a place so I would remember where to put the wing.
And here are the wing shapes.
I made this wing, and I made this wing.
Now in order to and make a hole, I used a toothpick and just poked it in there.
And then, 'cause when you try and put the brad in, especially the ones I get that don't cost very much money, the ends kind of will bend.
But, let me show you.
Once I cut it out and painted it and let it dry overnight, I put the top wing on top so it can move out and like it's flying.
So I made a little hole with a toothpick.
You could use a push pin or you could use something sharp.
Make sure anything sharp, you ask your parents to help you.
And then I figured out where it's shoulder would be and I put it there.
And I thought, "Oh that looks good like that, 'cause it goes down almost to its tail like a bird's feathers would."
And then put it through the last shouldery one.
And then I can turn it over.
And what you do with the brad is you push back this part and push back this part and it makes it stay on.
You might've seen these in folders or in other things that have movable parts.
So now, look, I can move his back wing that way and this one up like it's going to take off flying.
And the reason I made the back one a little wider is because when it goes down you want it to be able to fold under.
Now, when I measured for my wings to go in, let me show you what I did.
I figured out where the shoulder was and I put the other one in the same place, and I poked a hole through.
I held it and I put it over a little piece of foam or a sponge so that it doesn't poke your fingers when you try and poke it through.
Then you turn it over and flip it out.
Now I put feathers, and triangles, and diamond shapes, and stripes and lots of different feathers on its feet.
Now that might be a part that you have to just glue on, on the back.
I was able just to cut, and I only cut two toes, 'cause it was too hard to do three and the one in the back.
It's just stylized, kind of Charlie Harper-ish, so don't worry however you do it.
And it took me a few times to figure out the shape of it when I was making it.
And I brought the pieces so you can see what it looks like when it's not painted.
There is its body.
Here is it slender wing.
And here is it's heavier wing.
And look, they're not even the same length.
This one is a bit longer.
Doesn't matter.
You decide how you'll do your wings.
But when you put them together, when they fly, they can go up and down and make little areas.
Now, if I was going to do another one, maybe I'd want to do yellow, because then the paint will show up better.
But when you're going to do this, you can use your pencil and draw around and decide what's kind of like a flip-flop.
So you're going down, just an oval shape with a little triangle on the end, and you can cut it out and get started that way.
So if you want to see me do mine now and then work on yours later, that would be fine, 'cause it takes a while to cut it out.
And I didn't want you to miss seeing what I was talking about when you go to decorate it.
So I used a heavier paper, and I think the white one will help you see.
I could use my pastels, oh look at the set that came in the mail.
It has all the colors I would ever need.
And then I thought my colored pencils would be fun to use on this also.
So I'm going to make its triangle on its head, like it's hairline.
And I think I will do this, maybe I'll make it green.
I have not done green before, but I see that my pencil is a little dull.
And the thing about using these pencils, remember don't use an electric pencil sharpener 'cause it takes it off too much.
So I'm going to draw it's triangle head there.
And that is exactly where its beak will come out of.
And all that the beak is, is just a kind of a pointed oval.
It ends up looking like, oh, like an egg that has two sharp ends.
So let me make that, so you can see what I'm doing here.
And then it's big eye goes here, but I'm going to put decorations around the outside of the eye.
And remember, I really like when you do your own ideas.
You don't have to do mine.
So if I do that part, and if I look at my other one, bring it out for inspiration, I see that it has all colors around there, and I can start doing painting on that place.
But remember on these colored pencils what happens?
I can just scribble color if I want to, and then blend that in with my beautiful paint brush that has water in the handle.
Just paint it and have it blend in to make itself into paint, and make that part go around.
Now I think about analogous colors and what colors would look good with this, and I think maybe when I use my paints, I might want to do greens and blues.
And I told you before, that I don't clean my paint brush box, 'cause I like to use colors that have already been in there.
And if I squeeze a little water from my handle, or if you're using water from a jar and just moving it forward, do that.
And I can put some feathers on it.
I can make it in rows down and around like this.
I started at the top and made the feathers go down, and I think, "Oh, maybe some green would be pretty with it too."
Notice how I'm doing this.
I should probably move all these papers that are still really good and not getting paint all over them.
I was hoping that it would just help you see them a little better, but I don't want to damage my good paper.
Let me move these for a minute, boys and girls.
And then I'll go back to painting.
If you want to just practice painting yours right now, and not do it on an owl shape, you can do that too.
And just practice, "Oh, well maybe I would do some small feathers like Mrs. Readwright did."
And just go down the row and I'll get my other blue and mix some green in with it, 'cause I think it looks pretty with just a bunch of different colors and they don't have to all match what a real bird looks like, 'cause this one is stylized too.
And then maybe I'll put some little dashes around the top of his forehead, what makes us have the feathers up there.
Maybe I'll put some purple around his eyes and make the edge.
Oh, it came out kind of navy blue instead.
Maybe I have too much water on my brush.
Maybe a magenta would be pretty around it too, put it between each of the spaces.
Are you enjoying doing some things that you don't have to work into thinking, "Oh, well does it have to look like this?"
Because on art, you get to decide what colors and how you want it to look.
And maybe I would use something else on my next bird, because you can make your things all be different from one another and have a whole collection of them.
And you could have a little art show in your neighborhood and say, "Everyone paint an owl and bring it down to my front yard and we'll show each other, and we'll show people that walk by," kind of like a lemonade stand, but instead it's an art stand.
And same with the wings, you can do any kind of design.
Maybe on this one I'll make scallops and put some other colors in there.
It doesn't all have to be in the green family.
I can make it however I want.
Boys and girls, I hope that you will take a picture of yourself working on yours, because I would love to see a bunch of owls that can flap their wings.
You can bring them and show me, and we can send you one of the activity books.
Do you notice how I'm doing each one a little differently?
It's been a great week talking about birds and different ways of making birds look in art.
And I look forward to seeing you next week when we learn about a woman who uses shapes in her art and colorful shapes.
Collect a lot of circles, and I'll see you next week.
Happy weekend, boys and girls.
Bye-bye.
(upbeat music) ♪ Good morning to a brand new day ♪ ♪ Time to learn and games to play ♪ ♪ Learning things is so much fun ♪ ♪ Learning is good for everyone ♪ (upbeat music)


Support for PBS provided by:
Reading Explorers is a local public television program presented by Valley PBS