Bookish Baby
Season 1 Episode 108 | 26m 46sVideo has Closed Captions
The team builds a book-themed signpost for the nursery.
Tracy and Brad continue their journey to parenthood by working with a local bookbinder to create a journal for their baby. At home, the BABY MAKES 3 team are putting down eco-friendly carpet tile, building a book-themed signpost, and fitting out the nursery with other organically fashioned projects.
Problems with Closed Captions? Closed Captioning Feedback
Problems with Closed Captions? Closed Captioning Feedback
Baby Makes 3 is presented by your local public television station.
Distributed nationally by American Public Television
Bookish Baby
Season 1 Episode 108 | 26m 46sVideo has Closed Captions
Tracy and Brad continue their journey to parenthood by working with a local bookbinder to create a journal for their baby. At home, the BABY MAKES 3 team are putting down eco-friendly carpet tile, building a book-themed signpost, and fitting out the nursery with other organically fashioned projects.
Problems with Closed Captions? Closed Captioning Feedback
How to Watch Baby Makes 3
Baby Makes 3 is available to stream on pbs.org and the free PBS App, available on iPhone, Apple TV, Android TV, Android smartphones, Amazon Fire TV, Amazon Fire Tablet, Roku, Samsung Smart TV, and Vizio.
Providing Support for PBS.org
Learn Moreabout PBS online sponsorship-"Baby Makes 3" is funded in part by... -Dear baby, if you can't tell by the bump, you'll be here soon.
To be honest, I'm freaking out a bit.
There's still so much to do -- a lot of organizing, name picking, decorating, and cleaning, all while lugging around 25 or so extra pounds.
I guess I'm feeling a little bit crazy, but I'm allowed to be, right?
I'm your mom, and I want everything to be perfect for you.
I'll see you soon.
Love, mom.
-And by... ♪ -When it comes to baby's health, clean water is at the top of the list.
Food News Media -- supporting clean water for America's restaurant industry and for baby for life.
-Tracy and Bradley are expecting their first child.
The two make their home in a co-housing community where green is the new pink and blue and environmental consciousness and community is the standard of living.
Our "Baby Makes 3" team is here to put their ideas into action and create an eco-friendly, sustainable space for their newborn.
Our better world baby today, on "Baby Makes 3."
That moment when you go from couple to family, everything changes.
When you bring the baby home, you want to create a warm, comfortable, and safe environment for them.
Step one -- the nursery.
-Hi, I'm Tracy.
-I'm Brad, and I'm pregnant -- or we're pregnant.
She's pregnant.
-So we live in something called co-housing, and Brad and I like to describe it as an intentional community.
Everybody has their own homes, but we share common spaces.
-Part of the process of deciding to have a child for us was knowing that we wouldn't be alone in parenting, that we'd kind of have a community of people supporting us and supporting us in a way that could help us live out our values as parents.
You know, it's one thing to live out our values as a couple, but then to do it as parents is a whole other... whole other challenge.
And one of the cool things about being on "Baby Makes 3" is the opportunity to show the community we're living in.
-But I think it's one of the coolest things that we can share with people is the way that we have this community.
-Last time on "Baby Make 3," Tracy and Brad introduced us to the co-housing concept.
Their neighborhood features a community meeting center and gardens, eco-minded power and parking, and a sense of community togetherness.
In the nursery, we're creating a space that uses natural products that are safe and sustainable.
We're updating a bath, building a desk from pipes, and creating a space that takes advantage of their passion for books and reading.
Since Tracy and Bradley love books, I thought that it would be fun to create a keepsake journal for their baby.
So today we're at a home workshop of a local bookbinder who's gonna show us how to do that.
-Michael, hi.
-Hi, how are you?
-I'm doing well.
This is our couple, Bradley and Tracy.
-Hey.
Nice to meet you.
-Nice to meet you.
-I'm Michael Greer.
I'm the owner and founder of Leatherbound Book Works, which specializes in making electronic documents into leather-bound books.
-This is where you work?
-This is the bindery.
-I love some of these old tools.
-Yeah.
-Yeah.
-It's an honor just to get to work with them.
What we're gonna do is take one of these sheets.
Fold it up.
These are all gonna be trimmed off later, so...
Pull -- you're pulling out, so the movement is that way.
-Okay.
-Okay.
It will be 96 pages.
So one sheet yields two of these signatures.
And one signature is 16 pages.
So that is what we're gonna build our book out of, and then it will be trimmed down smaller.
-Great.
-Okay.
-All right.
So go for it.
-All right.
♪ -The next step is I'm going to have you all pierce it.
This is called a sewing cradle.
-Hmm.
-And I have made a little template for it.
And then you'll see there are -- -Oh, wow.
-Wow.
-Let's see, yeah, six holes in this one.
And just follow the template.
-Oh, wow.
-Go at it.
-So the holes have to be a certain distance apart?
-Yeah, they -- and that's why we have the template there.
-Oh, I see.
-And what happens, we're going to sew -- we're gonna sew your book onto the cords through those holes.
-Okay.
-And we need them all aligned.
-Yeah.
-All right.
-We're gonna move on over to this.
This is called a sewing frame.
-Whoa.
-It's essentially a loom for books.
And these are called sewing keys.
There's got to be a lot of tension... -Oh, okay.
-...on this.
All right, we're gonna take the signatures that you have now pierced.
Basically, you have a thread that goes throughout the whole book, back and forth like this, okay?
-Okay.
-When we -- when this length gets -- when we get to the end of this length, we'll tie on another one and keep it going.
So who's first?
-Go ahead.
-You're first.
-Okay.
-Any time you pull on the thread, you want to pull in the direction that you are sewing so that you don't tear.
-Sure, the pages.
-The pages, yeah.
-Cut.
-Mm-hmm.
-There you go.
This is... something like, it's not Elmer's Glue, but it's a white glue similar to Elmer's, meant to stay flexible for a long time.
I'm gonna glue this up.
It's gonna get trimmed afterwards.
-I know you've been thinking about it, but have you come up with a title for your book?
-So, one of the authors we both really like is Walt Whitman, and he sort of has a quote -- "Be curious, not judgmental."
And we really want our child to be curious and to be able to explore the world and experience all kinds of fun things with us.
-All right, this -- so we've got the book, we've frayed out the slips.
And what we're gonna do now is give some shape to the book.
All that thread that we put in there, you wouldn't think, but it actually makes the back of the book a lot thicker than the front of the book.
That will have given us our shape.
And so what you'll see there is a little -- -Oh, yes!
-And if done correctly, it's the same height as your boards, so your boards will just nestle right in there.
So what we're gonna do now is lace the covers on and trim the fore edge.
♪ So we've reached a point now where the book is in its covers.
We're gonna set this up and let it dry.
And the next steps will be covering it in leather.
-Great.
-All right.
-So we're gonna leave you while we let that dry.
And then I'll come back a little later, and I'll pick it up when it's ready.
-Sounds great.
-All right.
Fantastic.
-Oh, yeah, thank you so much.
-So great meeting you.
Thank you for sharing this.
-Beautiful watching your artistry.
-Thanks so much.
-Thank you.
-I was living in Morocco, and had been appreciating the books of a friend of mine who had a very extensive library in Casablanca.
And he directed me to the bindery.
And by chance went in on a day and met the binder and got to watch the binder work.
And at the end of that experience, I knew that I had found what I wanted to do.
And I've always loved books and I've always liked working with my hands.
This is an opportunity for me to kind of combine the two of those things.
-While we were at our bookmaker's workshop, Jonathan has been busy updating our bathroom.
Our couple will be sharing a single bathroom with their baby, so we will be childproofing this space and making it compatible for both parents and child.
We are organizing space and updating lighting.
We are also installing our Mason jar storage containers we made earlier.
♪ -So, this is one of my favorite projects.
It's a do-it-yourself stained glass.
-Cool!
-So you have a piece of glass above your windows.
So what we did is we took Plexiglass, cut it the same size.
-Okay.
-And then Lauren designed this beautiful, simple piece.
And we traced it out.
And we just put it underneath the Plexiglass.
-Mm-hmm.
-Okay.
-And now we're gonna turn it into stained glass.
-Awesome.
-Well, stained-glass look.
-Right.
-Right, right.
-So the first thing we're gonna do is we're gonna take a hot-glue gun.
-Mm-hmm.
-But instead of regular glue, we're gonna use this black glue.
-Okay.
-Because I want it to mimic the look of a stained glass and the lead in the glass.
-Oh, yeah.
-So we're gonna use black glue.
-All right.
-Okay.
-So it's really simple.
We want to go slowly, though, but I'm gonna take it, and we're just gonna trace these lines with the black glue.
So I'll do a little bit and then you guys can try.
-Great.
-All right, yeah.
You gonna want to do one of these every season -- for every season?
-Um, I don't know.
I feel like our hands are gonna be awfully full soon.
A few other -- a few other projects.
-Wow!
This looks fantastic!
You guys -- wow!
-We're almost done.
-All right, I have some palettes for you.
We're just using paper plates.
-Okay.
-I'm just gonna make some dollops.
Orange.
Some green.
And, remember, these are glass paint, so it's nice and light.
You want the sunlight to come through.
-Sure.
-So I'm just gonna play with one of your leaves, and then I'll make you a palette, and you guys can go to town.
-Great.
-Okay.
You know, less is more 'cause you can always add.
So I'm just gonna start out with... -Ooh.
-...a little green.
And the great thing is is it makes a border 'cause it's such thick glue.
-Right.
-And you won't go outside the lines -- unless you want to.
Then you can.
You can kind of mix your colors if you want it like that.
-Oh, right.
-Some shading.
-Add just a little bit of color.
Yeah.
Oh, nice.
-A little fall color.
So we've got plenty of different colors for you to choose from, lots of different brushes for you to use.
So I'm gonna leave you to it.
Have fun, let your creative juices flow.
-All right.
-Sounds great.
-Let's do it.
-All right.
-Members of the Pacifica community came together earlier to help create the signage for our book-themed signpost in our nursery.
Each chose a favorite book and applied their artistic skills.
All right, Steve.
I have our signpost -- or our signs.
-Excellent!
Wow, that is going to be a really great accent on the wall.
-It will.
-It's gonna be so inspiring and fun for the kid.
-Yes, bringing the book theme to life.
-Yeah, exactly.
Outside, Jonathan is painting the uprights of our nursery toy bin.
We've chosen a bright-red zero-VOC paint to match other color choices in the room.
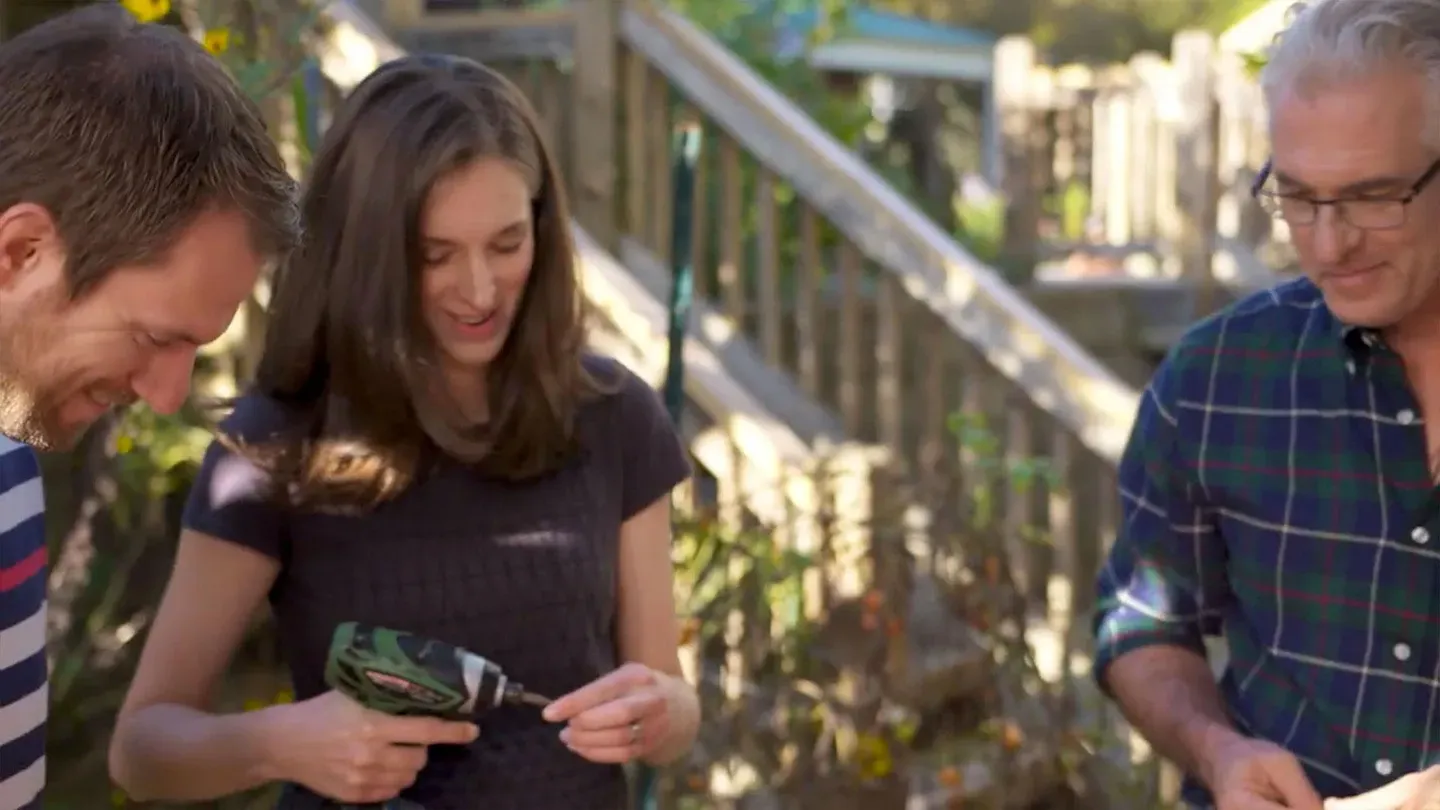
-All right, Brad, Tracy.
-Yeah.
-We are getting ready to assemble your farmers' market toy stand.
So here's what we're going to do.
We have our leg parts here to assemble.
In addition to that, we have the three boxes that are gonna go in and make the actual toy stand.
Well, shall we begin?
-Yeah.
-Excellent.
So the first thing we're gonna do, we have a 6-inch-wide vertical support and an 18-inch-wide leg.
-Yeah.
-So we're going take the back side of our leg... Flip it up, let's bring it back.
And, Brad, if you will line that mark up.
Hold that there.
-All right.
-All right, trade spots?
-You'll be better than me, I'm sure.
-No.
I don't know about that.
This is not the same as my drill.
It'll take me a minute.
-Beautiful.
-Great.
-All right.
-Thank you.
-Yeah.
Thank you.
-The next step, we're going to stand both of these up.
-Okay.
-So stand these up.
Remove our sawhorses.
-So let me hold this leg right here.
Bradley, you can help her with with the box.
We're gonna start again with the smaller one at the bottom.
-The bottom, yep.
-Mm-hmm.
♪ -It looks great.
-Right now, we're creating a carpeted area in the nursery over their concrete floors.
Lauren and I are checking in with Jonathan to see how it's going.
Lauren, the color looks beautiful!
And it looks great against the concrete.
-Hey, girls.
How y'all doing?
-Hey, Jonathan.
-May I see one of those?
-Absolutely.
-So, Lauren, remind me about this product.
-Yeah.
So this is a very green product.
It's made of 62% recycled content, and it's also recyclable.
-Wow.
That's great.
-And it feels like nylon fiber.
-It is.
You're right, yeah.
-What about VOCs?
I know that's important.
A lot of people don't think about VOCs coming or emitting from carpet, but... -But they can.
-Yeah.
-Yeah.
So this is a no-VOC product.
It's actually rated, it's certified for its air quality, which is great.
-Oh, wow, which is obviously important for a nursery.
So, Jonathan, talk us through the install.
-It's actually a really pretty easy install with this particular product.
If you actually look on the back, you have arrows that will help you figure out exactly what line you want to follow.
Just make sure that they all flow the same way and it will also keep your line and design in the same direction.
You can also switch it up in this particular case.
We're going to be doing a parquet pattern, so a little off-setting.
-Doing a quarter turn with each piece?
-Do a quarter turn with each piece, and you'll come up with that result.
Another beautiful option with this is that it's easily cut and shaped to any design that you really want to put it in and it's got some self-adhesives that we would be attaching on the corners so that it doesn't slide.
And this itself, the actual fabric on the bottom actually will adhere to this floor pretty well as it it.
-Great.
And I just want to mention, too, that, again, that this is so great, Lauren, because they're in squares, so if there's a spill and you can't get it out of your carpet, you could just replace one of them.
-That's right.
-Not the whole rug.
-That's right.
-So that's brilliant.
-Thank you.
-Love it.
-Okay, all right.
-All right, good deal.
Well, let me finish up.
-Okay.
-We'll leave you to it.
-This is great.
-Thank you.
-There you go.
-All right, see y'all.
-Beautiful.
Now we're ready to see it all come together.
Jonathan and Steven are hanging a rug on the wall.
Textiles such as this are great for room acoustics.
Steven is securing it to the wall with a butterfly anchor, also known as a toggle bolt.
We're securing our toy bin to the wall in much the same way.
With young children around, all furniture should be anchored to the wall.
♪ Meanwhile, Jonathan is adding window treatments to our glass doors.
These blinds do have cords, and the anchors will be placed up high, well out of reach of toddlers.
Our book signpost and tree-branch mobile are next to go up.
Just a few more finishing touches, and our nursery will be ready.
When you're hanging a mobile in your child's nursery, the number-one thing you want to think about is height.
You want to make sure that it's high enough that you child doesn't reach it even when he or she is standing in the crib.
♪ Our nursery is complete.
Let's go get Tracy and Brad.
What are you most excited about seeing in the room?
-You know, I don't know if it's one particular piece, but just, you know, we've seen the individual pieces that we've worked on.
-I think it's gonna be exciting just to sort of see it all come together.
-Yeah.
-All right, you ready?
-Yeah.
-I'm so ready.
-Absolutely.
-Okay.
-Yes, let's do it.
-All right, let's do it.
-Oh, wow!
-Wow!
That is... [ Laughs ] -What do you think?
-Oh, and look at the window!
-Yes!
-That's so great.
-I love the carpet!
-Yes!
-And, Brad, come here.
Come here, Brad.
Come here.
-Yes!
-Look at that.
-Yes!
-I love it!
-Isn't that wonderful?
-I love it!
-And the older the child gets, you can change it out.
-Yeah.
-This is gorgeous.
-Yeah, this is great.
-That, you can change that out, but it's works of art.
And it's safe.
-Oh, great.
-Yeah, yeah, yeah.
-And then this is your changing pad, which is multifunctional.
You know, when baby grows out of that, you can use -- reuse that.
-Oh, that's great.
-That is wonderful.
-That's great.
-These are the adjustable book shelves.
-Oh, that's right!
-So look at that.
-Yes.
-They are not going anywhere.
-Oh, good.
-Nice.
-And then if you want to add books, you can just slide it back out.
-Down there, yeah.
-Do you want to try out your chair?
-Rocker, oh, sure!
-You just -- both of you are gonna spend many a night on that chair.
-Yes, we will.
Yeah, we will.
Oh, this is great.
I can -- yeah, I definitely can imagine... Yeah, spending some time together in the chair.
Yeah.
-So this is your crib with natural wood, and of course -- -This looks great.
-As your baby gets older, it will turn into a bed.
And this is your tapestry that will hopefully inspire your child.
-That is gorgeous.
-And Steve really, really anchored that to the wall.
-Oh, good.
-And then we wanted -- we wanted a sort of a natural mobile that would kind of inspire your baby.
It's hung up high enough for them not to reach it.
-Yeah.
-I love that.
-Yeah, it's beautiful.
-You built this.
-Yes.
-This scared you, but yet you persevered, Brad.
-Yes.
-And you made it.
-We did it.
And now it looks great.
-Yeah.
-With toys, with the diapers in it.
-And I love this signpost over there.
-Yeah!
-Yeah, it was so nice to be able to do that with our community.
You know, one more way they're gonna keep supporting us while we're -- -Yeah.
Community is even in the nursery with you.
-Yeah, yeah, exactly.
That's what I love.
You know, one of the things we wanted is for this to be a room that would look great as a nursery and be able to grow with the baby.
-Yeah.
-Like, you know, when the crib becomes a bed, the room has so much possibility.
-Yeah.
-It looks great, and there's so much possibility.
-And it's gonna grow with your child, like this bookshelf.
-Right.
-Yes.
-When they get older, this can be a desk.
-Absolutely.
That's right.
-So you only have one bathroom between you and baby.
-Yep.
-And it was a little cluttered.
-A little cluttered.
-So we definitely needed some help with that.
-Yeah, so we've done some work in there.
-All right.
-Want to see it?
-Let's see it.
-Absolutely.
Oh, my goodness!
-This is way better.
-We also got rid of the towel rod.
Now you have three places to put your towels rather than just one.
-I like that there's a towel ready for baby.
-Yep, yeah.
You can put up, you know, put anything sharp or inappropriate for baby to touch, you don't want it on the counter.
You want it way up here.
-That's great.
-So we got that there.
So come this way.
Storage space.
-Oh, right!
-Your Mason jars.
-Oh, that is so cool.
-Yeah, I made those.
-You made those?
-Yeah, I did that.
-Nice.
Good work.
-I have one more thing to show you.
It's a surprise.
-Okay.
-So let's go back in the nursery.
-All right.
-Let me lead the way.
-Okay, ready for your last surprise?
-Yes.
Let's see.
-Yes.
-Ooh.
-Ooh.
-Look at that.
-Oh, my goodness!
Oh!
It's beautiful.
-It's the book we helped make.
-Yeah.
-"Be Curious."
That's what we hope for our baby.
-So, now that you've seen the nursery, do you feel a little more prepared?
-Well, this was a cluttered room before.
And it was like, "How are we gonna have this ready for when the baby comes?"
-It's true.
In time.
-And now it's like... whenever the baby's born, there's a place for the baby.
-Does it make it more real?
-You know, that's one of the interesting things is I think there keeps being these moments where it becomes more real.
And so this is another moment where it becomes more real.
-Yeah, and it's exciting.
-Yeah.
-And overwhelming -- but in a good way.
-Yeah.
-Yeah.
I'm just really -- I'm really happy that you all were able to design this nursery in such a way that it is environmentally friendly, and, therefore, reflects our values as well as the values of our community.
-Mm-hmm.
-You know, it really...
It's sort of a room that integrates well into the -- not just our house, but the whole community.
And that's really nice to know.
-I think you both are gonna be incredible parents and are gonna inspire your child.
-Thank you.
-Thank you.
-I'm Melissa Lozoff for "Baby Makes 3," and it's time to put this one to bed.
Do you like this one?
-Yeah.
Cute.
♪ -Closed captioning is brought to you by... Snuggle Me Organic -- organic cotton and wool loungers and bed sharing cushions for baby.
-"Baby Makes 3" is funded in part by... -Dear baby, if you can't tell by the bump, you'll be here soon.
To be honest, I'm freaking out a bit.
There's still so much to do -- a lot of organizing, name picking, decorating, and cleaning, all while lugging around 25 or so extra pounds.
I guess I'm feeling a little bit crazy, but I'm allowed to be, right?
I'm your mom, and I want everything to be perfect for you.
I'll see you soon.
Love, mom.
-And by... ♪ -When it comes to baby's health, clean water is at the top of the list.
Food News Media -- supporting clean water for America's restaurant industry and for baby for life.
-Safety first.
"Baby Makes 3" nurseries are created for newborns.
Some projects may not be suitable for older children.
When in doubt, seek the help of a licensed contractor.
For more information, visit us on the web at babymakes3.tv.
-The "Baby Makes 3" DVD set helps make those first parenting decisions the right decisions.
Discover more than 50 nursery projects, including a starlight ceiling and nursery accent wall.
Create a fun, adorable, and safe space for your baby.
Available for $19.95 including shipping and handling.
Order online at babymakes3.tv.


Support for PBS provided by:
Baby Makes 3 is presented by your local public television station.
Distributed nationally by American Public Television