It Takes a Community
Season 1 Episode 107 | 26m 46sVideo has Closed Captions
The team discusses how they’ll work to create an eco-friendly nursery.
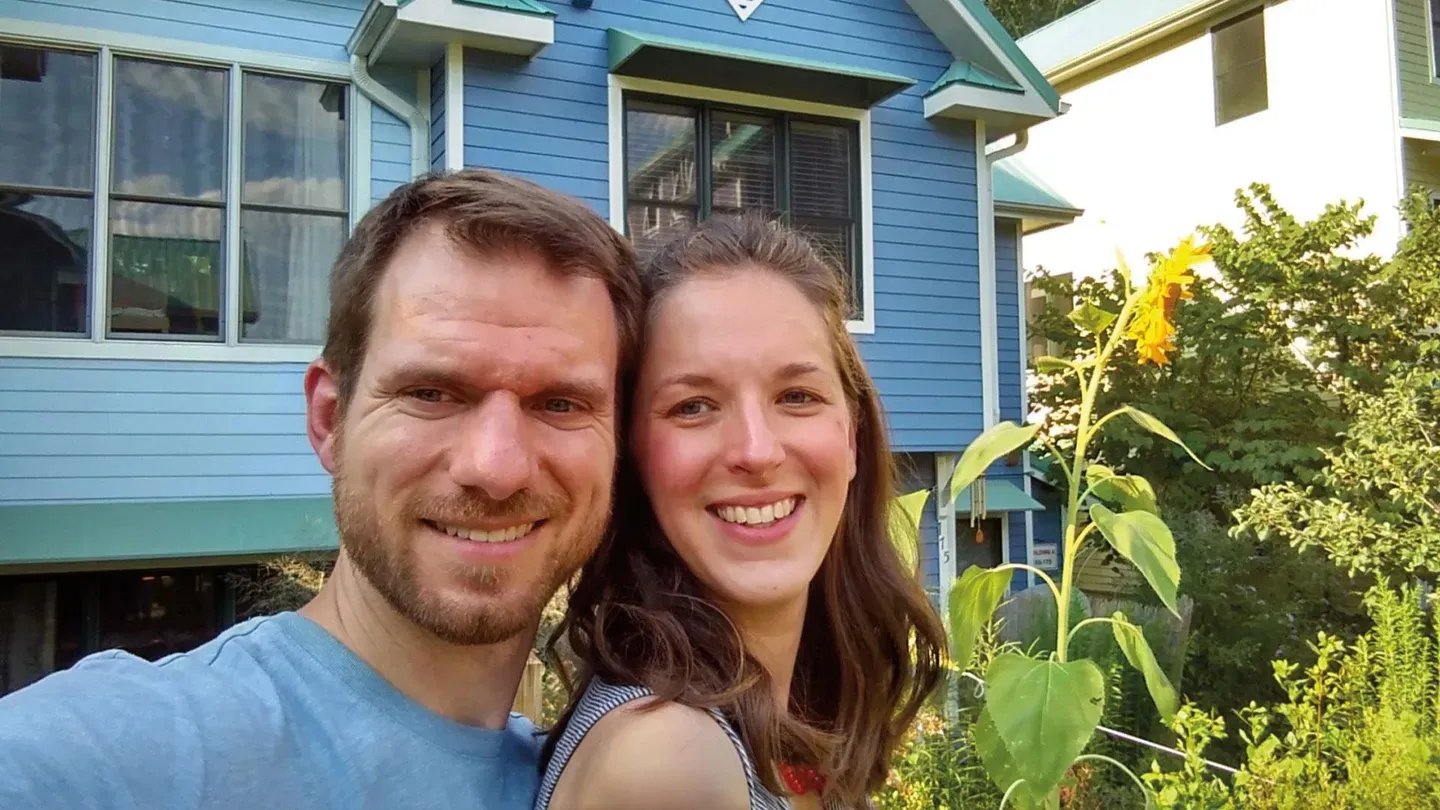
Tracy and Brad give a tour of Pacifica, the environmentally conscious co-housing community where they live. The BABY MAKES 3 team discusses how they’ll work to create an eco-friendly nursery using materials that are safe in every respect. They build a pipe bookshelf, begin their update of the bathroom, and build a book stack lamp from scratch.
Problems with Closed Captions? Closed Captioning Feedback
Problems with Closed Captions? Closed Captioning Feedback
Baby Makes 3 is presented by your local public television station.
Distributed nationally by American Public Television
It Takes a Community
Season 1 Episode 107 | 26m 46sVideo has Closed Captions
Tracy and Brad give a tour of Pacifica, the environmentally conscious co-housing community where they live. The BABY MAKES 3 team discusses how they’ll work to create an eco-friendly nursery using materials that are safe in every respect. They build a pipe bookshelf, begin their update of the bathroom, and build a book stack lamp from scratch.
Problems with Closed Captions? Closed Captioning Feedback
How to Watch Baby Makes 3
Baby Makes 3 is available to stream on pbs.org and the free PBS App, available on iPhone, Apple TV, Android TV, Android smartphones, Amazon Fire TV, Amazon Fire Tablet, Roku, Samsung Smart TV, and Vizio.
Providing Support for PBS.org
Learn Moreabout PBS online sponsorship-"Baby Makes 3" is funded in part by... -Dear baby, if you can't tell by the bump, you'll be here soon.
To be honest, I'm freaking out a bit.
There's still so much to do -- a lot of organizing, name picking, decorating, and cleaning, all while lugging around 25 or so extra pounds.
I guess I'm feeling a little bit crazy, but I'm allowed to be, right?
I'm your mom, and I want everything to be perfect for you.
I'll see you soon.
Love, mom.
-And by... ♪ -When it comes to baby's health, clean water is at the top of the list.
Food News Media -- supporting clean water for America's restaurant industry and for baby for life.
-Tracy and Bradley want to build a better world for their baby, and they're getting an early start.
The two are making their home in Pacifica, a co-housing community where green is the new pink and blue, and environmental consciousness is on everyone's mind.
With baby's well-being in mind, we're going to help our couple create a sustainable space for their newborn using a host of eco-friendly products and ideas.
Our better-world baby today on "Baby Makes 3."
-Hey!
Ta-da!
-Yay!
High five.
-[ Laughs ] -Nice.
-That moment when you go from couple to family, everything changes.
When you bring the baby home, you want to create a warm, comfortable, and safe environment for them.
Step one -- the nursery.
-Hi.
I'm Tracy.
-I'm Brad.
And I'm pregnant.
Or we're pregnant.
-[ Laughs ] We met about seven years ago.
We were both living in Toledo, Ohio, at the time.
-Yeah.
-And then the rest was -- -I drove my mom's minivan to pick her up for the first date.
-[ Laughing ] It's true.
-Yeah, it's true.
-The license plate -- -She was immediately in love.
You know?
-License plate says "Nana DD."
-[ Laughs ] I was in grad school and poor.
She was working.
-In community mental health, so I was also poor.
[ Both laugh ] Currently in my career, I work for an organization that focuses on child mental-health issues and specifically in child trauma.
-And my career has mostly been education.
I was an English teacher, a reading specialist.
And I've recently taken a little foray into filmmaking to make a documentary film.
-We live in something called co-housing, and Brad and I like to describe it as an intentional community.
Everybody has their own homes, but we share common spaces.
So we have a common house where we can have events.
We can show movies.
We can throw parties.
We have meals together, things like that.
And we have community gardens where some of them are actually sustaining the entire community, where we all work together and plant things like sweet potatoes, and then we have a great big sweet-potato harvest in the fall for the community.
And then there's other parts of the gardens that are just for us.
We have two garden plots in the community gardens where we grow our own fruits and vegetables.
-One of the community's main values is the environment.
We do composting.
There's some solar energy.
There's a water cistern that collects rainwater, and that water is used for... -A variety of purposes.
-...a variety of purposes.
I guess we decided to not find out what the baby's sex is, because we kind of wanted to delay those gender roles and gender expectations as long as possible.
-But I think, also, both of us are very excited about the surprise.
I mean, I think -- -Oh, yeah, yeah.
-I think if we absolutely wanted to know, we would have found out and just tried to keep it a secret.
-So, Lauren, our couple is Brad and Tracy, and they live here in this co-housing community.
-It's beautiful.
I feel like it already gives me a little sense of their style.
-And they're very green, they're very open-minded, and they're so excited about this nursery.
-Oh, great.
I can't wait to see their space.
-Yeah, they are.
-And these flowers are gorgeous.
-Oh, and they're tin, actually.
That's very solar.
-Oh, yeah.
-Yeah.
-That's right.
-That's a great point.
-Hello.
-Hi.
-Hey.
-Come on in.
Nice to meet you.
-Wow, look at you.
Hi.
-Nice to meet you.
-So, when are you due?
-The end of November.
-Oh, that's coming up, isn't it?
-Yeah, it is.
-Yeah, it's exciting.
I love your space -- indoors and out.
It's just great.
-Thanks.
-We would love to see where you want to put the nursery.
-Yeah.
-Yeah.
-This is the room.
It's right across from our bedroom.
-I love the light in here.
It's beautiful.
-We're very fortunate that the back of our house butts up to, sort of, the woods.
-Yeah.
-And so we have sort of a peaceful place but then, yeah, lots of light.
-Yeah.
Is this cement on the floor I see?
-Yeah.
So, they're concrete floors.
-It's beautiful, but it's hard, so we'll think about that.
So, this is a two-bedroom, one-bath condo.
-Mm-hmm.
-So you'll be sharing the bathroom with your baby.
-Yes, that's true.
-So, safety is another thing we want to think about when you're sharing a bathroom with a baby.
Because not only do you have to think about the slippery floors and the bathtub, but you're gonna have things in there that aren't baby-safe, like jewelry and other things like that.
So, we'll want to address that.
-I definitely think we can add more storage and some safety features just be redoing a few things.
-I'm glad y'all are here.
-[ Laughs ] -I also really love your community, and I would love to see more of it.
Could you show me around?
-Absolutely.
-Definitely.
-Great.
-Yeah.
-Well, I have some measurements to get, so I'll get started on that.
-Okay.
Well, okay.
-Great.
-Sounds good.
-Wow.
It is so beautiful out here.
Wow!
That is a pear tree.
Right?
-Yeah.
So, that's one of the cool things here is that when they planted things right after they built, they included edible trees and bushes.
There are grapevines, also, over there... -Wow.
-...fig trees, things like that.
-So lucky.
-Yeah, it's great.
-So, where are we in the community right now?
-I would say we're kind of in the center of the community, sort of both physically and -- I don't know.
Sort of the heart of the community here.
-Yeah.
The heart of the community.
'Cause basically -- I mean, right over here, we have the common house, which is where we have all our social events, potlucks, movie nights, dinners, that kind of thing.
Right over here is where we have drinks on the patio, 4th of July events, Memorial Day events.
-Oh.
-So a lot of the social activity happens right around here.
-That sounds like a lot of fun.
-Yeah.
-Yeah.
-And then, just past the patio, we have the guesthouse.
And so, that's one of the great benefits of living here is that we're able to sort of have a smaller house.
We don't have to have a spare bedroom for guests.
We can actually use the guesthouse.
And so, when our guests come, you know, soon, for the baby, we actually will have a place for them to stay.
-That sounds wonderful.
-Yeah.
-Oh, wow.
Well, I would love to see more.
-Absolutely.
-Yeah, let's do it.
-Among the many surprises in this community is that some residents choose to dry clothes the old-fashioned way.
Boat sheds reflect the passion of the residents for the great outdoors.
Well, I notice that there's paths, and there's no cars at any of the houses.
-It's true.
So, we all park sort of around the perimeter, and so it's one of the ways that it actually keeps the community really safe for children.
Kids -- Oh, wow.
-Yeah.
-That's incredible.
-Yeah.
-Tomorrow will be time to get started on our nursery, and Lauren will return with her plans.
-I'm so excited to show you the design for your nursery today.
-Yes.
We're stoked.
-We're excited to see it, yeah.
-Well, good.
Well, let's jump right in.
So, first, let's look at the focal wall, which is always the crib in a nursery.
And behind the crib, I would love to hang a rug.
Hanging textiles on the wall are actually great for acoustics, so muffling sounds in the rest of your house, as well as just providing a visually-stimulating thing for your baby to look at when they're trying to go to sleep or when they've woken up.
Below the rug, we have your crib.
Now, this crib, it has a natural wood finish on it.
The other thing, I think, that's really great about it is it's actually a four-in-one crib, so it goes from a crib, to a toddler bed, to a day bed, and to actually a full-size bed.
-It matches a lot of our goals, I think, not to just sort of have a piece of furniture for -- or any item for a short period of time but to really make the most of it.
-Good.
I'm glad you like it.
On the left side of the crib, doing a signpost with different places from books to bring in the book theme that you wanted.
-I love that idea.
-[ Laughs ] -And it will inspire them to read, which is important.
-Mm-hmm.
-Absolutely.
Absolutely.
-And then the last piece on this wall is a branch that will hang above the crib as a mobile.
-Mm.
-That's great.
-Beautiful, yeah.
-Because we're using so much wood in your nursery, we want to make sure that you know that we're gonna be using stains that are non-toxic, eco-friendly, very baby-safe.
-We definitely kept that in mind with all-new materials as well, like doing organic crib sheets, an organic changing-pad cover, everything like that.
Above the dresser, high enough that your child will not be able to reach it, I wanted to do just some small shelves where we can lean your favorite books to kind of function as art.
-We would love that, I think.
We have friends and family that have given us their favorite books, and so to be able to use them as art and to be able to share them with our baby will be so exciting.
-On the dresser, again bringing that book theme, we'll create a lamp with a stack of books.
-That is, like, the raddest thing I've ever seen.
[ Laughter ] I love that.
-Mm-hmm.
-So, it's great.
-Yeah.
-[ Chuckles ] To the left of the dresser, we're gonna build an industrial bookshelf out of pipe and wood.
And then, we also wanted this piece to be a little bit multifunctional, so this surface is actually gonna be at desk height so that it could be used as a desk either by your or your child when it reaches that age.
-Oh, fantastic.
-Cool.
Yeah.
-Yeah.
-Going over to this wall where you have your double doors, I'd actually love to see what happens when you create this art piece -- a stained-glass piece in the transom.
-Yes, we're gonna be -- It's a do-it-yourself project that we're gonna take on later.
-Wonderful.
-It's gonna be a lot of fun.
-Then, on the opposite wall, we're gonna build a piece of furniture that looks like this.
This was just kind of inspiration of almost a produce stand with crates that can serve for toy storage.
-Yes!
-Nice.
-Oh, that's great.
-On the floor, right now you have concrete floors.
We really wanted to soften that up and do something just really fun.
So, this is a carpet tile.
You can see it has a striped, multicolor design.
So I'd love to use this to cover the majority of the floor, and actually do something interesting with the pattern by turning it different ways.
-Oh, yeah, okay.
-Hm.
Okay.
-Great.
-Since you will be sharing the bathroom with your baby and it's off of the nursery, I know Melissa and I had talked and really wanted to do this space for you, as well.
In the bathroom, I did want to pull a color that we're using in the nursery since they are adjoining spaces.
This kind of turquoise tone, I think, would be really pretty.
-I love that color.
It's beautiful.
-So, one of the things we wanted to address are the concrete floors.
You know, that would have a tendency to be slippery when wet, so we really wanted to cover the floor with bath mats.
So we have one that addresses the tub and another that's in front of the main vanity.
I think another issue is storage.
-Mm.
Yes.
-Yes.
-Right now, you have a single towel bar beside your bathtub, and that really only holds one towel.
-One towel, yes.
[ Laughs ] -So I felt like, "why don't we do hooks instead," which will allow you to hold all of your towels that you're using there.
-That sounds great.
-So, you have another area of your bathroom, sort of a water closet, with a toilet and another vanity.
And in there, I wanted to give you more storage.
And we wanted to create these mason-jar shelves.
-Oh, great.
-I think this design is great, because it really nicely marries functionality and aesthetics, and hits on the themes and the ideas that we had in mind.
So, it's way better than anything I could have come up with.
[ Laughter ] -I also really love that you're incorporating, sort of, reading, which is something I think both of us care a lot about and I think were very much important parts of our own childhood.
And so, we're excited to share that with our child, and to be able to share it also through the room will be great.
-We are keeping our nursery walls their existing color.
But in our bathroom, we'll be painting a variation of turquoise that will pick up some of the colors we'll be using for the baby's room.
Naturally, we'll be using a zero-V.O.C.
paint.
Wow.
Sven, it looks beautiful.
I love this teal color.
-Yes, it's amazing, isn't it?
-It's bright and cheery.
It opens up the space.
-Yes.
-Quite a transformation.
-Thank you.
-And I know that we used no-V.O.C.
paint.
We've talked about that before.
But say you paint 10 houses.
How often do you get asked about V.O.C.s?
-I get asked quite a lot, especially for people with certain allergies or with small kids or pets, when they're concerned about the V.O.C.s in the air.
It's become a popular topic.
-And tell me -- What options are there out there?
-Well, there are low-V.O.C.
and no-V.O.C.
paints.
Low-V.O.C.
paints do have a certain amount of V.O.C.
levels, but the best bet is to go with a no-V.O.C.
paint.
And those paints are about any color of the rainbow.
Every manufacturer has a zero-V.O.C.
paint that they can make into any color they want, any sheen, from flat all the way to semigloss and gloss.
-I am thrilled that all of these new products are coming about and people are interested in organic materials and we're keeping our air safe.
-Yes.
And to me, there's no difference in the quality of the paint or the finished product.
-Oh, it's beautiful.
This is beautiful.
-Thank you very much.
-You're welcome.
There are also a number of organic paints on the market with ingredients used from the food industry that are completely biodegradable.
Paints can also include ingredients that prevent mold and mildew.
And for the very green among us, you can now buy paint in containers made of recyclable plastics, labels printed in soy ink, and delivered by biodiesel-fueled vehicles.
I'm going to help Tracy and Brad seal and stain the shelving for the bookshelf we're using.
And we have a wonderful, eco-friendly product.
This product easily mixes with one gallon of water.
So, I have the boards that Steve cut for your bookshelf.
-Great.
-And they're a beautiful pine.
-Yeah.
-So, we want to keep that finish natural.
So what I'm really excited about is the stain we're gonna use to do that.
This is non-toxic.
It's V.O.C.-free.
It's eco-friendly.
-Uh-huh.
-So, if you're ready, I'm gonna show you how to stain these.
-All right.
-Wonderful.
Yeah.
-Okay.
Great.
So, I'm gonna take a rag, and I'm gonna dip it in your stain.
You want to definitely squeeze it out, 'cause you don't want too much.
-Mm-hmm.
-And you just want to use long, easy strokes.
-Okay.
-You basically just want to cover your whole piece of wood.
And the great thing also about this stain is you only have to put it on once.
-Oh, wonderful.
It's really beautiful the way the wood and sort of all the character's gonna show.
That's really nice.
-Yeah.
-Yeah.
-And it also prevents mold and mildew, so it's perfect.
So, I'm gonna give you both gloves -- not because it has any chemicals but because it can get a little sticky.
-Okay.
Sure.
-So, you want to... -All right.
Awesome.
-Thanks.
-And I'll give you each a rag.
-I'm ready.
-Okay, so, remember, when you dip it in, make sure you squeeze it out, 'cause you don't want too much.
-Okay.
-Okay?
All right.
-Great.
-Let's do it.
-And you want to re-dip your rag when you feel like it's getting a little bit dry.
And you can just dip it back in your stain, squeeze it out, and then continue on.
-I'm really happy that we're able to use products that will be safe for the baby but also, it sounds like, safe for us.
-Once our shelves have dried, our contractor Jonathan will begin assembling our pipe bookshelf.
Our bookshelf is made out of galvanized pipe and fittings that are available at most home-improvement stores.
There are numerous plans for various desks and shelves online, but typically they have to be modified for your particular space.
This project requires a bit of work but offers a great look and functional space when you're done.
-All right.
Watch your fingers.
-Ah, you have started.
It looks great.
-Hey, thanks, Melissa.
-Wow.
And how are we securing it to the wall?
-Once this is all set, leveled, and in place the way we want it, we'll just slide it close to the wall and attach the flange.
We'll mark our holes for our exploding anchors to hold behind the Sheetrock so that this is secure and does not tip forward.
And then we will mount it to the wall -- very simple.
-And the other thing that I like -- We're starting at this height, right?
-We are.
It is set, right now, at 30 inches, which is, give or take, a standard desk height and also high enough that a child under several years of age is not tall enough to use it as a ladder, climb on it.
-Children see bookshelves, and they want to climb them, so I like that it's at this height.
-Yes.
Yes.
-That's great, Steve.
How can I help?
-Well, let's get started.
We will -- Jonathan and I were laying out our T's for our cantilever, so we'll slide those one.
We've got an Allen wrench here.
-Okay.
-If you just want to, as we slide them on, tighten one of each screw and put it in place.
-All right, so I can go ahead?
These adjustable "T" joints will hold the piping that supports our shelves.
They will also provide more support against the wall.
Underneath, tab-panel fittings will support the desk.
Steve marks the support flange against the wall and will secure these with toggle bolts.
This will make the desk extremely sturdy -- perfect in a child's room.
We will use a level to make sure everything is straight.
Now Steve is ready to attach the flange to the wall.
All of our joints are secured by hex locking bolts.
Brad and I are going to have some fun building a much smaller project out of pipe.
All right, well, this is our book-lamp project.
-Okay.
-The way we're gonna do it is we're gonna take our pipe and we're gonna build it up here, and then you're gonna be able to put books underneath.
and then you can change them out.
But your books will stay safe.
-Ooh, awesome.
-But it'll look like a book lamp.
-That's great.
-Isn't that great?
-Yeah.
-Okay.
So, you're gonna help me out here.
-Okay.
-Okay, so, what I have is -- Basically, this is just a block of wood.
I got it at a craft store.
-Mm-hmm.
-I've stained it already, and it's the same stain as your bookshelf.
-Awesome.
-I have pre-drilled a hole in it.
-Okay.
-And then I mounted this plate.
-Mm-hmm.
-So, the first step we do is we take this power cord, and we're just gonna feed it through our pre-drilled hole.
All right, so, then, we're gonna take our 3/8-inch galvanized pipe, and we're gonna feed it through.
-Let me get that with these needle-nose pliers.
-Okay.
Yes.
-There we go.
Maybe I'm handier than I give myself credit for.
-Yeah, I told you you could do this.
Just pull it all the way down, and then we're just gonna twist this in.
Okay, perfect.
And then, we're gonna take our second piece, just gonna feed that in.
-So, I'm just gonna feed this through here?
-Yep.
-Easy enough.
-Yeah.
And then, you put it...
I'll hold it for you.
And just twist that in.
There you go.
So, our next piece is our little elbow piece.
-All right.
-Give you that to feed through.
Want me to get it?
All right.
Perfect.
-So, we want it to end up?
-Yes, you want it to end up.
-Okay.
-Now we come to this piece.
So, this is our galvanized pipe.
This is a lamp rod.
-Okay.
-So, we want to make sure that the lamp rod fits into there.
So, we had to make this piece ourself.
We're just gonna feed this first.
So, I'm gonna have you do that.
So, feed it the wire.
-Yeah.
-And then, we'll attach it to our lighting kit.
Yep.
Perfect.
Nice.
-All right.
-Lamps of all kinds are fun to design and make.
Most home-improvement and craft stores have all the parts you need, including complete kits, to help turn many objects into lamps.
Wiring a lamp is fairly straightforward, but if you're unsure check out one of the many instructional videos available online.
-All right.
-Test it.
-Are you ready?
-I'm ready.
-Here we go.
Hey!
Ta-da!
-Yay!
High five.
Nice.
Love it.
-[ Laughs ] -Tracy, so, what we've got here is we're going to put together our mason-jar, bathroom-supply mix-and-match that's gonna go, actually, on the wall.
-Okay.
-All right?
It's up to you how you want your color coordination to go.
-All right, well, I think I really like the idea of maybe the three colors.
-Okay.
-Yeah, so, you know, we could do, like, green and then clear and then purple.
-Okay, perfect.
What we need to do, since, again, it is a mason jar -- It needs to be secured to the wall.
-Sure.
-So what we've done is we've gotten these round clamps, and we're going to run them over the actual jar.
-Okay.
-Before we do that, we're going to drill the holes.
-Secure these, okay.
-Exactly, so, drill the hole and actually secure it to the board.
-Okay.
-And, so, we can do that.
We've already pre-drilled... -The hole?
Okay.
-...the hole, so we're gonna go ahead and attach this.
And what we need to do is take a 1 1/2-inch wood screw... -All right.
-...and then just secure it.
And this is a rather, again, easy project.
-Yeah.
-Pretty simple.
Not too many moving parts.
What we'd like to do is go ahead and slide one of those in.
-All right.
-Just start on either side.
-Okay.
Get it even down to the bottom, and you want to kind of run that same thing to where they're -- -Ohh, okay.
-Exactly.
So, now... -Sort of even with the -- All right.
All right.
-Does that look good?
-Yeah, It looks great.
-Again, you can adjust them.
These are fully adjustable.
So, now what we want to do is we want to tighten down that circular clamp.
And be careful not to tighten it down too much.
-Okay.
-Let me hold this for you so it's not wiggling around.
-All right, now, there's -- See how that's... -All right, so, that seems like it'll hold.
-All right.
-I think you're pretty close to having that one tight.
-Yeah, all right.
There we go.
-All right.
-Want to see about that?
Yeah.
-Last one.
-All right.
-All right.
-Like that.
-I think we're good.
-Yeah.
-I think -- Do we have it?
Let's take a look and see what you think.
-Oh, that looks great.
I can really -- I think it'll be great.
-Yeah, I think that'll be really nice.
-This has been quite a learning experience with Tracy and Brad's co-housing, eco-friendly nursery.
We're off to a good start, but there's plenty left to do.
Next time, we'll be laying an environmentally-friendly carpet tile over our concrete floors.
And we'll be taking Tracy and Brad to a local bookbinder for a special project.
We'll be building several more projects for the room, including adding book-themed touches to the room, creating a hot-glue stained-glass window, and getting this nursery ready for baby.
Our couple is determined to bring their baby into a better world.
All this next time on "Baby Makes 3."
-[ Gasps ] Oh, wow!
-[ Laughs ] -Closed captioning is brought to you by... Snuggle Me Organic -- organic cotton and wool loungers and bed sharing cushions for baby.
-"Baby Makes 3" is funded in part by... -Dear baby, if you can't tell by the bump, you'll be here soon.
To be honest, I'm freaking out a bit.
There's still so much to do -- a lot of organizing, name picking, decorating, and cleaning, all while lugging around 25 or so extra pounds.
I guess I'm feeling a little bit crazy, but I'm allowed to be, right?
I'm your mom, and I want everything to be perfect for you.
I'll see you soon.
Love, mom.
-And by... ♪ -When it comes to baby's health, clean water is at the top of the list.
Food News Media -- supporting clean water for America's restaurant industry and for baby for life.
-Safety first.
"Baby Makes 3" nurseries are created for newborns.
Some projects may not be suitable for older children.
When in doubt, seek the help of a licensed contractor.
For more information, visit us on the web at babymakes3.tv.
-The "Baby Makes 3" DVD set helps make those first parenting decisions the right decisions.
Discover more than 50 nursery projects, including a starlight ceiling and nursery accent wall.
Create a fun, adorable, and safe space for your baby.
Available for $19.95 including shipping and handling.
Order online at babymakes3.tv.


Support for PBS provided by:
Baby Makes 3 is presented by your local public television station.
Distributed nationally by American Public Television