Pita Bread and Lamb with Jeffrey Alford and Naomi Duguid
Season 2 Episode 3 | 24m 6sVideo has Closed Captions
Chefs Jeffrey Alford and Naomi Duguid make a Mediterranean feast starting with Pita Bread.
Chefs Jeffrey Alford and Naomi Duguid make a Mediterranean feast beginning with Pita Bread.
Problems playing video? | Closed Captioning Feedback
Problems playing video? | Closed Captioning Feedback
Pita Bread and Lamb with Jeffrey Alford and Naomi Duguid
Season 2 Episode 3 | 24m 6sVideo has Closed Captions
Chefs Jeffrey Alford and Naomi Duguid make a Mediterranean feast beginning with Pita Bread.
Problems playing video? | Closed Captioning Feedback
Where to Watch Baking With Julia
Baking With Julia is available to stream on pbs.org and the PBS app.

Visit the Julia Child Experience
Get recipes, read tributes from celebrity chefs, and more. Bon appetit!Providing Support for PBS.org
Learn Moreabout PBS online sponsorshipBoom!
Hello, I'm Julia Child.
Welcome to my house.
What fun we're going to have baking all kinds of incredible cakes, pies and breads right here in my own kitchen.
Toronto bakers Naomi Duguid and Jeffrey Alford have traveled the world learning to bake flatbreads some long, some chewy and some crisp.
Today they'll share some of their favorites.
Join us on... [Captioning sponsored by VIEWERS LIKE YOU] I have in front of me an eastern Mediterranean feast.
It starts out with pita bread baked in the oven pita bread on the griddle and another bread that is...
I don't know exactly how it's baked but all kinds of condiments that go with it.
And Jeff Alford and Naomi Duguid are going to do it for us.
Naomi, you're going... Well, this bread is a lemon-tomato bread.
It's called lahmejun or lahmejin.
And we'll be making that later, but... Jeffrey will start.
I do the easy one, it's a pita bread.
You'll make the dough.
I'll make the dough, the important part.
I leave you to it.
Okay.
The dough is very simple as the bread is very simple.
Mm-hmm.
Flour, salt and water and a little bit of yeast.
That's basically what pita bread is.
I'm going to measure 2½½ cups of warm water... What, is that, warm, about sort of body temperature?
Body temperature.
A little warm to my wrist or a little less than that.
I'm going to sprinkle on a teaspoon of dry yeast and just let that yeast dissolve in the warm water.
It just takes a second.
Now we have the water and we have the yeast and the yeast is dissolved into the water.
Now I'm going to add flour.
You're going to add whole wheat flour.
Whole wheat flour and I'm going to measure out 2½½ cups.
We preferred these pitas mixed-- a little whole wheat and a little white.
Oh, you can do it all whole wheat if you want.
Do it all whole wheat or all white, as is most common but we add the whole wheat just for a little more texture.
Mm-hmm, and then with the yeast you can have a little more yeast if you want.
I think a lot of times people would add a little more yeast but we believe the slower the fermentation the better the flavor of the bread.
I think so, yeah.
And who's in a hurry?
I think so, yeah.
And who's in a hurry?
No, we're not in a hurry.
Now I'm going to stir.
And I've always told myself to stir a hundred times in the same direction because it just starts activating that gluten and it gives me a good head start.
Now, why in the same direction?
Because those gluten strands... You sound like an Italian grandmother.
( laughing ): Yes.
You didn't know?
( laughing ): No.
In the same direction.
It keeps those strands of gluten going in the same direction without breaking them.
Because they are strands.
Reinforcing them, helping them to build.
I see, yes.
I think this is looking just about fine I see, yes.
just about ready.
Kind of smooth and silky.
Smooth and silky.
Yeah, it does.
Now, nothing like a rubber spatula to get all that sponge back.
I'm going to cover this with a plastic wrap.
Yeah.
And I'm going to set it aside.
Now, I can set this aside for 30 minutes I can set it aside for five hours for eight hours... Mm-hmm, yeah.
whenever I'm ready to get back to it.
It's a forgiving mixture.
Very forgiving.
Yeah.
Now, I'm going to set it back here.
Gosh, look what it's done.
Here is a sponge that... That's wonderful.
Yes.
Look, you can see... That's falling in on itself.
It's really alive, isn't it?
Mmm.
It certainly looks...
Isn't that fascinating what it's doing.
It's falling in on itself.
It looks kind of frightening.
Yes, something alive, that's for sure.
Yeah.
With my sponge-- I still need more flour-- and I'm going to put a tablespoon of salt.
Mm-hmm.
And this is rather coarse salt.
I'm going to add a tablespoon of olive oil just because I think it has... you can taste the olive oil-- even that small amount-- in the breads.
And I'm going to stir... stir that sponge and, again, to stir fairly gently and in the same direction.
Well, that's interesting, yeah.
Just wanting to keep those strands of gluten alive and not to tear them.
From this point on I'm only going to add all-purpose flour.
It will depend on the day it will depend on how much moisture is in the air and the age of your flour and the type of flour that you have how much flour your dough will accommodate.
I'm stirring from under and coming over with the flour just to roll that.
A simple knead, isn't it?
A second cup.
I like to try and get as much flour into the dough at this stage as I can because I think it makes it easier to knead once I have it out.
Mm-hmm, and if you put in too much flour you could always add a little water.
When you think of it it just has basic flour and water and salt...
It would make a perfectly nice, just regular bread.
Regular bread.
Yeah.
Okay, now I think it's approaching the stage where I can turn it out.
I'm going to...
I'll get rid of your yeast for you.
a little sprinkle here.
The other very important thing to bread making is to have a surface that's appropriate for you that stays still when you move and that's a good height.
Don't do it on a card table.
Don't do it on a card table.
Yes, all my surfaces were 38 inches.
Thirty-eight inches.
I know people that might not like that.
Yes, I do, too.
Too bad for them.
Too bad for them.
They have their own.
Here, I'll take it out for you.
Thank you.
Now, just like all doughs, it needs to be kneaded.
Now, it's still...
Still quite rough.
And sticky, yeah.
And sticky.
Yeah.
We're often talking to people who will say "You know, bread making-- oh, it's too tricky" or "It's not for me."
And then we realized well, it's actually kneading that people are not necessarily comfortable with.
And I think one of the most important things about kneading is to be comfortable and to knead with your body rather than your arms because if you haven't been kneading before it can be... ten minutes of kneading can be tiring.
And we're going to have ten minutes of kneading?
Ten minutes.
Well, that's good for your arm.
You get half.
You don't get that flabby upper arm.
Now, I think it's just about a well-kneaded dough.
It looks wonderful.
What do you think?
Give me...
It certainly, ooh, it feels awfully good.
It has a certain tension to it.
It's smooth on the surface and a little bit of a sheen on the surface.
And it holds itself.
So now what happens?
So now I'm going to oil the bowl just a touch of oil.
You don't need much.
It smells good, too.
It smells good.
You want a taste?
Sure, I love raw dough.
My mother always said not to eat that dough but I could never resist.
I love it.
Good.
Good.
Now I'm going to cover this with plastic... Mm-hmm.
and I'm going to let this rise until more than double.
More than double.
Remember we have not all that much yeast in here.
So I'd give it a good two hours to three hours.
Mm-hmm, okay.
I'm going to put it back here.
Here you can see a risen dough.
Look, it's fully risen.
It's expanded here.
We can compare the two, yes.
So sometimes it's deceptive because if you have a big bowl it's harder to tell what double or more than double is.
But you can always do it by feel.
Oh, let's see the feel.
Very slowly coming back.
Yes.
At this stage I'm going to have a little bit of flour on my work surface.
And I'm just going to knead gently just a couple minutes.
What I might do with this is I'm going to cut it in half and I'm going to put half into plastic and put it in the refrigerator.
Okay.
And tomorrow morning when I want some fresh bread I can now just bring it back out.
And that will go into the fridge when you're ready.
Go into the fridge.
Yeah.
Okay, here we have... Now.
We're going to divide in half.
Then again in half.
We're going to make eight pieces out of this, so... One of the things with pita is that we want fairly uniform balls and discs and the way I do that is I roll it on a surface underneath my palm like this.
I keep my thumb in and my finger in tight to create a fairly good circle with the indentation at the bottom.
Hmm, I have to see if I can do that.
It just sort of automatically forms itself, doesn't it?
Yes, you kind of want to press hard and work in the same place that you did the last one because it starts to build up a little bit of stickiness... Mm-hmm.
and the dough adheres to it.
Beautiful.
This is just like making French rolls, isn't it?
Yes.
Now, these don't need to rise.
They're ready right now.
They're ready.
Good.
So my next stage now... Flatten it out.
And I like to flatten with my fingertips and get as much flour in at this stage so you don't need... Oh, that's interesting.
You don't need to roll out with this much flour and you don't have it sticking to your rolling pin when you do.
Mm-hmm.
So let's try working with four.
Make them well floured and get them punched down.
You go back to your first one.
Now you don't need so much flour.
If you get a lot of flour on them, picking up and then it just comes off in the oven and starts to burn, and you... Yeah.
With this, it works right in.
Yes.
Now, because this is a risen dough, a yeasted dough it'll come back on me a bit-- that gluten will pull back.
Yeah.
So what I like to do is to work with several at the same time.
I can see that...
It's starting already.
It comes immediately back in on itself.
You just need to let it rest for a minute.
Let it rest, and then it will go out easily.
Mm-hmm.
Now it just goes out so easily.
Yes.
It's not coming back on itself.
Just letting it rest does that.
Yeah.
I think they're ready... they're ready to go in the oven.
Even if that's shrunk up?
It's shrunk up a bit but it has a very nice effect when it hits, hits the oven because little bit of shrinkage and you'll see the effect on the surface of the bread.
When you want it...
I like that.
I hate to lose the temperature of the oven so as many as you can get in at one time, the better.
And they're not sticking to each other, so they're just fine.
Now, this oven we have preheated to 450 and inside, on the bottom rack, we have quarry tiles unglazed quarry tiles.
Are you ready?
Well, if I'm ready... hope those... those tiles are good and ready.
Yeah, I see those quarry tiles in there.
We actually have room in there for more.
How long do they take, Jeff?
Oh, they'll cook very quickly, four to five minutes.
And that's all.
You want your tiles very hot.
If I see the preheat light go off I still give it ten to 15 minutes because...
They have to be...
Very hot tiles.
I see, there are kind of blisters starting there already.
Oh, they're coming.
Well, there's a big blister in there.
I think there's nothing funner than watching them come up.
I love that.
Because you get all that action so fast.
I tend to like crispier bread, harder surfaces so I tend to overcook sometimes, a little bit brown on surface but if you like them softer, then you should pull them out a little bit before you see browning on the surface.
As soon as they've puffed, they're done?
Not quite.
Not quite.
I'd say, 30 seconds after they've puffed they can come out.
Gosh, well, they've all risen.
Isn't that exciting?
Okay, let's pull them out.
Okay.
Ooh, nice one.
Ooh, look at that, then you can see the steam...
The steam just coming out.
Now, if you're cooking...
I stack them on top of each other and then I put them in a towel.
And that... You don't care if they...
Keeps them soft.
Oh, you don't care if they collapse.
I don't care if they collapse.
Once you've created that pocket...
It's going to collapse anyway.
It's going to be in there anyway-- isn't that a beauty?
That's a beauty.
Julia: That's marvelous, isn't it?
What I'm going to do is I'm going to put these over there and wrap them in a towel with the others, keep them warm.
Julia: I notice you have pans heating up here, too.
Now, there's another way to make, to cook the same bread.
Oh, there is... well, good.
The way I first realized that I could make pita in a skillet was I was living in Taiwan and I couldn't find pita bread and, uh, I could find whole wheat flour, flour but, but no bread.
And I had a small apartment and all they had was a burner so I was, started playing around and realized that you can make perfectly fine pita in a skillet.
It's a little trickier, it's a little less dependable to make that pocket, but...
I have rolled this out and I haven't turned my dough over.
I've only rolled on one side.
So I take the top surface like they make chapati in India and I, I take that top surface and I go down with it first.
So the top surface remains on top.
Yeah, for a very short time, for about 15 seconds.
And then I'm going to turn it.
Now, you're going to ask me why I did that.
Yes, why did you do that, Jeff?
The theory goes, in India that you create that little bit of crust on that first side and that allows it to hold in the steam and when you have a lot of bubbles beginning you're going to turn it over and let it cook on the third side fully.
Well, this one's doing quite... That one's doing pretty well.
You can see the puffiness.
So let's go to the third side.
Now, these are a little drier on the top surface.
With a pita on a skillet, you don't get the same effect as a big balloon.
No.
But you do... it is separating.
See, now, this one's almost in a balloon there.
Yes, it is.
After they've ballooned, I usually let them go for about 30 seconds, just to make sure.
Yeah, mm-hmm.
Naomi's going to use exactly the same dough and make what is called in Turkey a lahmejun.
Well, let's call her in.
Now, is this the same dough that made by your husband?
Yes, yes, this is the pita dough but it's been rolled out a little more thinly.
We're going to let those dough rounds sit there and relax.
We may stretch them a little more before we finish.
We're going to fill them.
You're going to do an exotic something, right?
With lamb.
We've got the ground lamb here and we've got some shallots.
And what we're wanting to produce here is, um... about a quarter cup of chopped shallots but again, that's not... precision isn't really the issue.
You're just getting a flavorful sauce to, uh, to dress the breads with.
And then we'll just sort of measure what I've chopped and we'll see whether, how close we are... That looks fine to me.
Yeah, there we are, there's a quarter cup.
So now we've got some garlic.
Now, again, we call for three cloves of garlic but look at the size of this clove so I think two will do.
Plenty of garlic.
Plenty of garlic.
I like chopping garlic, not pressing it.
I don't know about you.
I don't care, as long as we have plenty of it.
As long as we have a lot of it.
Now I just finish mincing this garlic, and... then we'll put some oil in that pan.
We put in about a teaspoon of oil and I just think a dollop will do it.
Could you spread that oil around the pan for me, please?
That's great.
Okay, in they go.
We might need to turn that heat down a little because we just want them to soften without getting too enthusiastic.
I'll turn it down.
Oh, great, and I'll dump in the shallots.
Now, if you can keep an eye on that I'll get the tomatoes chopped and we'll be set.
A nice smell of garlic and olive oil.
What is better, huh?
Now, let's just get rid of the center core.
Now, these plum tomatoes are quite tough.
You know, there's not much juice in the middle.
And that's good, because, really they're going to cook down a little but you really, um, you want that, the solid outside husk.
Now let's add these to the... tomatoes.
Now, those tomatoes are going to sit there for a minute... How are those looking?
They're softening.
So let's, um let's tuck the lamb right in there.
And the lamb is looking...
It's minced lamb, fairly lean.
How about, about how much?
It is a quarter pound.
That would be about... almost a cup, I guess.
And then we'll need to break those, um... break those, uh, lumps up.
So you break the lumps up a little and just let the lamb get a little color.
And you could be vegetarian if you wanted and not use any lamb.
That's right, and if, for a vegetarian version perhaps instead of using eight plum tomatoes of that size you might use ten or 12 and I'd up the shallots.
I mean, you want to give it some flavor and body.
Why don't you put in some eggplant or something?
You could put some eggplant in.
That's a good idea, yep.
Now, that brightens up the brown.
Yeah, that does.
And now the tomatoes are going to have to cook a little because they're a bit thick-walled and we all want them a bit softened.
Now, we can just let that simmer if you can just keep an eye out.
I'll watch them.
We're going to be cooking the breads on the pan and just need to lightly oil it.
If you have a nice big, fat pastry brush like this one it's sort of fun to play.
This is part of the cooking job that our kids really like.
Yeah.
Yeah, playing with the oil.
Now, this is thinner than those pitas and I'm going to stretch it a little more.
Do you want to stretch one?
Oh, sure.
Just pull it... they're nice and soft, aren't they?
And you can sort of pull them around the edge a little bit and stretch them out.
That is nice and soft.
Isn't that a pleasure to handle?
Now, we're close to done here.
Let's just see, are these tomatoes soft?
They're getting there.
I'd like to leave them a few more minutes but we can, why don't we put the spices in?
And then, by the time we've done all that we should be fine, now...
I like to use about 1/8 of a teaspoon of cinnamons.
You don't want the cinnamon to be the only thing you taste.
You don't want to taste it and say, "Oh, cinnamon."
"Oh, cinnamon."
You know, you just want to sort of think "What's that pleasantly elusive 'mm-mm' in there?"
Lovely, yes.
And the same amount of allspice which I find one of those mysterious tastes that... you miss it if it's not there but you never quite... Never quite know what it is.
Know what it is when it's there, you know?
Let's just stir that in.
Does it get salt into it?
And then we need some salt and some pepper.
About half a teaspoon of salt seems to do it.
And then, about a quarter teaspoon of black pepper.
Now, you can take peppercorns and, you know... grind them by hand, or we can just be extremely generous with a pepper grinder.
That's looking pretty soft.
All right.
And, then, the question of how much you use on each bread is, again, a matter of, of preference.
I like mine quite smeared.
Jeff likes his a little sparer.
You put it on hot.
You're going to put it straight into the oven.
You can smear it close to the edge.
Now, um... pine nuts.
Oh, pine nuts, goody.
We didn't have to roast them because it's going straight into the oven, so... And again, it's a matter of your pleasure.
I like pine nuts, so I tend to, um...
The more the better, yeah.
go a little heavy, but they're...
They have a very special taste, too.
They do, and that richness when you bite into them.
They're getting expensive, so you can, you know... do whatever you wish.
All right, let's go.
Okay.
And the oven's now... What's your oven at?
The oven's at 450, and the rack is in the middle of the oven.
How long are they going to take?
About seven minutes.
Good-- it's all preheated.
Julia: Ooh, look at them.
Naomi: Let's see how these are.
Catch a whiff of them as they go past?
Mmm.
Yeah.
Here, I can get that for you, if you like.
Okay, good.
Oh, those look lovely.
Thank you.
Now, we have a whole display.
An eastern Mediterranean... Feast.
feast.
You're going to show us how to do it.
I'm going to start, I'm going to make you a plate.
A pita, I'm going to tear a pita apart.
Use it as a spoon, I think, is a... most common method.
You really eat a lot with your fingers here.
Yes.
This is a lentil salad with red pepper.
This is, um, chick peas with spearmint.
I love chick peas.
With spearmint.
With spearmint.
Ah.
These are yogurt cheese balls.
One made from goat and one made from cow's milk yogurt.
And these are all recipes that are in the book that comes with this series.
Oh, wonderful, so they'll know how to make these.
Great.
We could also put a little cucumber on here and perhaps some herbs, right?
An important part of the eastern Mediterranean table is the pile of herbs that are always there.
You can just add a f... just add a bit of mint or a bit of... one of my favorites here is tarragon.
Now, have a taste.
Jeff, do you want to show... us how?
Yeah, I just open up the, use the pocket and even tear the pocket apart and push in with my finger and, um, adorn it maybe with a little piece of mint and it's ready.
Go for it, Julia.
Great.
Mm.
That's nice.
Thanks.
Yeah.
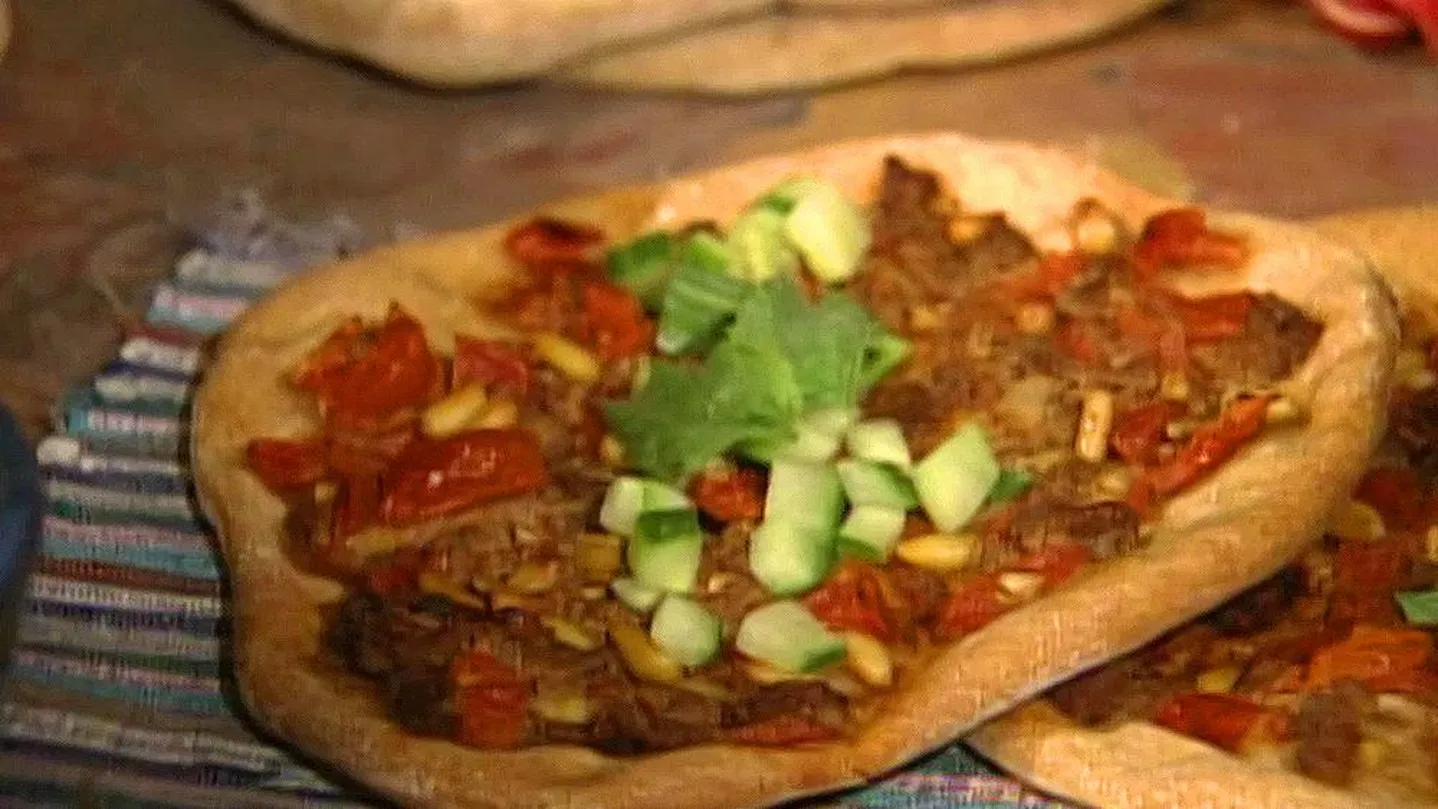
Now, how about these great pizzas?
These lahmejun, as they're called, they're lamb breads.
Here, let's just tear this one.
And then, a classic way... You need a little mint for that.
Yeah, is to put a little mint on it.
And then you can even, and perhaps a little cucumber.
It's sort of a nice texture contrast.
And then we can just roll it.
And you'll have that bit of pine nut in there, as well.
I can taste that bit of cinnamon.
In the lamb.
It's interesting how bits of spices change the whole thing.
Now, that's delicious.
They really transform it.
Thank you both so much.
It was wonderful to see all that dough being made.
I thoroughly enjoy it and thank you for coming, Naomi.
It's been a real pleasure.
Oh, it's been a pleasure for us.
It was a pleasure for me, too-- thanks a lot.
Thank you.
Julia's got Julia: Bon appétit!


- Food
Christopher Kimball’s Milk Street Television
Transform home cooking with the editors of Christopher Kimball’s Milk Street Magazine.


 New Episode


Support for PBS provided by: