TK-330: Triangles
Season 3 Episode 156 | 14m 13sVideo has Closed Captions
Join Mrs. Readwright at Camp Discovery!
Transitional Kindergarten teacher, Mrs. Readwright, welcomes students back to Camp Discovery, a fun learning space packed with reading adventures & fun games!
Problems playing video? | Closed Captioning Feedback
Problems playing video? | Closed Captioning Feedback
Reading Explorers is a local public television program presented by Valley PBS
TK-330: Triangles
Season 3 Episode 156 | 14m 13sVideo has Closed Captions
Transitional Kindergarten teacher, Mrs. Readwright, welcomes students back to Camp Discovery, a fun learning space packed with reading adventures & fun games!
Problems playing video? | Closed Captioning Feedback
How to Watch Reading Explorers
Reading Explorers is available to stream on pbs.org and the free PBS App, available on iPhone, Apple TV, Android TV, Android smartphones, Amazon Fire TV, Amazon Fire Tablet, Roku, Samsung Smart TV, and Vizio.
Providing Support for PBS.org
Learn Moreabout PBS online sponsorshipMore from This Collection
Valley PBS and Fresno Unified School District have partnered with Golden 1 Credit Union to create Reading Explorers Lessons for grades Pre-Kindergarten through Third grade. The daily lessons will be taught by Fresno Unified School District teachers and are created to help students practice their reading skills and reinforce lessons during distance learning.
Video has Closed Captions
Valley PBS presents Reading Explorers Lessons for Pre-Kindergarten and TK. (26m 27s)
PK-TK-693-The Most Magnificent Thing
Video has Closed Captions
Valley PBS presents Reading Explorers Lessons for Pre-Kindergarten and TK. (26m 26s)

Video has Closed Captions
Valley PBS presents Reading Explorers Lessons for Pre-Kindergarten and TK. (26m 28s)
Video has Closed Captions
Valley PBS presents Reading Explorers Lessons for Pre-Kindergarten and TK. (26m 28s)
PK-TK-690: The Very Clumsy Click Beetle
Video has Closed Captions
Valley PBS presents Reading Explorers Lessons for Pre-Kindergarten and TK. (26m 22s)
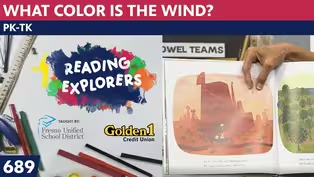
PK-TK-689: What Color is the Wind?
Video has Closed Captions
Valley PBS presents Reading Explorers Lessons for Pre-Kindergarten and TK. (26m 21s)
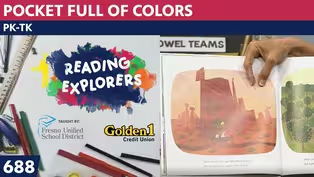
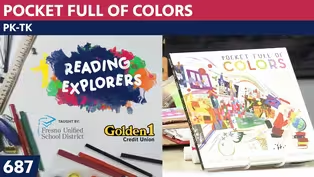
PK-TK-688: Pocket Full of Colors
Video has Closed Captions
Valley PBS presents Reading Explorers Lessons for Pre-Kindergarten and TK. (25m 58s)
PK-TK-687: Dancing Through Fields of Colors
Video has Closed Captions
Valley PBS presents Reading Explorers Lessons for Pre-Kindergarten and TK. (26m 20s)
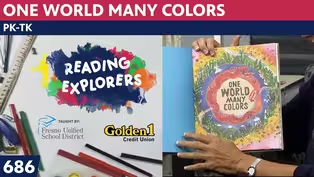
PK-TK-686: One World Many Colors
Video has Closed Captions
Valley PBS presents Reading Explorers Lessons for Pre-Kindergarten and TK. (27m 13s)
PK-TK-685: School is Wherever I am
Video has Closed Captions
Valley PBS presents Reading Explorers Lessons for Pre-Kindergarten and TK. (26m 32s)
PK-TK-684: If I Built a School
Video has Closed Captions
Valley PBS presents Reading Explorers Lessons for Pre-Kindergarten and TK. (26m 21s)
PK-TK-683: The Pigeon Has to Go to School
Video has Closed Captions
Valley PBS presents Reading Explorers Lessons for Pre-Kindergarten and TK. (26m 22s)
Providing Support for PBS.org
Learn Moreabout PBS online sponsorship♪ Good morning to a brand new day ♪ ♪ Time to learn and games to play ♪ ♪ Learning things is so much fun ♪ ♪ Learning is good for everyone ♪ (bright music) - Hello, early learners.
It's me, Mrs. Readwright and I'm welcoming you back to the art room for our final day of Faith Ringgold.
Let's start off with our hello song.
♪ Hello nice to see you everyone ♪ ♪ Hello nice to see you everyone ♪ ♪ Hello to you ♪ ♪ Hello to you ♪ ♪ Hello to you ♪ ♪ Hello to me ♪ ♪ Hello nice to see you everyone ♪ Now Faith Ringgold.
I wanted to tell you this about her.
Her story quilts really tell the story of the African-American experience.
In the last one we looked at the sunflower quilting bee at orals, she had eight important women around that quilt and she put them in there for a reason.
And we didn't study those people today.
But I know miss Laura is studying a lot of famous African-Americans in her week, so tune in and see if some of those women who are around the quilt are also the ones that she is introducing to the children.
Let's sing the song about Faith Ringgold.
♪ Faith Ringgold the talented artist ♪ ♪ She paints story quilts and writes books ♪ ♪ She creates soft sculptures makes masks and art prints ♪ ♪ Join me as we take a good look ♪ And the art I chose today to tell you about is called the "Windows Of The Wedding" number 20 no children.
I think they were saying don't bring your children to this wedding but it doesn't have anything in the artwork about that, but I thought it was an interesting one and I wanted you to see it because Faith Ringgold's mother who designed dresses and different fabrics, she looked at Tibetan thangkas, it's a Tibetan quilt.
And I thought this one tells a story of geometric shapes.
And I thought, wouldn't it be fun to do our own and use our favorite colors and make some paper that looks like one with fringe at the end.
We probably won't get to make the fringe today, but I wanted to show you how I am folding my paper after we look at the art up here, here it is.
And it's made by squares that have triangles drawn on them, and some are made into parallelograms.
These are different colors and you can decide if you're gonna cut them in half that way or cut them in half longways.
So it does a pattern longways, across.
Vertical, horizontal.
So this is one triangle, one triangle.
This one is, that side of the triangle is split down the middle and in the middle it's the same thing.
They're adding different size triangles here and different colored triangles here.
She put it on plaid fabric behind it, and then this wiggly art just like the Kente cloth.
So let's get started on how we're going to make this.
You set everything aside.
If folding paper is hard for you, don't worry 'cause you don't have to make it perfect.
Let me pick up my little table, and I have my white paper, my pencil and my ruler.
Here's how I folded my paper.
I got my full sheet of paper and I first did lengthwise and I folded it and made the edges crisp.
And you just do that by, some people use their fingernail and drag it across and that makes it a sharp one.
Then I folded it again, lengthwise and I use my fingernail to do it tight.
Now I can't keep folding it this way 'cause it would be too hard for me to fold.
So I'm going to now keep it in half, look at this way I have it in half lengthwise, but now I'm going to fold it across this way and use my fingernail and fold it down.
And then I can fold this piece in and this piece in.
Now I have all of the squares that I can divide.
And I wanted to show you how I'm doing this.
So I'm gonna start with these two middle pieces.
And what I'm doing is thinking what looks like it's about the middle of that at the top?
Put a dot there.
Put a dot on everyone down dot right on the fold, right in the middle of that square, dot.
And I'm going on the next one dot at the top, dot about in the middle, it's not perfect 'cause I didn't measure it.
But I think it's going to look good enough.
And I am just being inspired by Faith's work.
I don't have to make mine look just like hers, but here's how I'm going to do it.
I find the corner of each side of this and where I drew a dot at the top, I put this on the corner and this here.
Now if you don't want to use a ruler don't.
And I'll show you how I would do it if I decided, oh a ruler is too much trouble.
Then I would do it like this let me show you.
I say to myself here's the corner of that square, here's the corner of this square, and there is the top one.
I'll just draw it as carefully as I can connect the dots, connect the dots.
And I could even draw straight across to make that triangle show up better.
Same thing.
I kind of like the ruler because I can line it up a bit.
Where's that corner?
Right there.
I push the ruler against it and get next to the dot.
And if you need a grownup to help you with this, maybe you can have, if you have a grownup or a older brother or sister who can hold your paper or help you figure out how to do this, 'cause it isn't a fast project, this is a project that's going to take me a few days to finish.
So on Monday I will bring it back with my other art that I have finished for the week and show you what I've done, and see if you like the colors that I choose to go next to each other.
I'm still drawing my shapes.
Do you notice I'm not rushing, because it makes it look so much better.
Oh, okay put my pencil in the corner, line it up with that dot.
See I'm putting the ruler right up next to it, and I press against the ruler and push.
And I find that little corner and I put the ruler up next to it, push it against my pencil and there.
I have one more for this row and then I'm gonna show you what I'm going to do to make it colorful.
And then I'll do the next stripe.
But I'd like to show you in stages so that you can get an idea of what we're doing here.
And then I put this last one, put my pencil in the corner, put the ruler up against it, where is that dot?
Where's that dot?
Oh, there it is and connect it.
There we go.
Okay, let's see how nice I will make this.
I think I want to do, do I want to do my paints or I think pastels will make it brighter.
I'm going to use cool color on this one, go over that part and fill it in.
I'm not using anything under here 'cause I didn't want it to look striped like corrugated, and I might put the green over on this side as well.
And what color do I like with this lime green?
I like turquoise with it.
When I buy things that have turquoise and green together, I think it looks really good.
Come on turquoises is this you?
I think it is.
Oh no it's the tone of in between turquoise and dark blue.
Notice how I went around the outside, so that way I can just go, just like I've taught you before do it in rows.
The rows make it neater.
If I went all over like this, do you notice the difference?
It doesn't make it as beautiful.
And I like for mine to be beautiful.
And try and cover over any white spots 'cause pastels will really fill in.
I'm going up and down now and meeting where I did side to side.
And you won't be able to tell because I'm doing it side to side, side to side.
And what colors would be good next to there?
I think if I use the dark green, sometimes my pastels get a little short on the paper side and oh it ends up I get colored pastels under my nails when I try and peel it but that's okay.
I'm gonna use dark green here along the line, along the fold, oh it went wiggly, along the fold, along the edge, and I'm filling it in.
How's yours coming along, boys and girls?
Are you using crayons?
Are you using pastels?
Or did you decide to do yours with watercolor?
I thought about using my watercolor pencils in filling in and making my quilt look that kind of soft and watery looking, I think in the middle of this one I'll put orange.
'Cause on the, this fabric that we have on our table, it has orange and green together and it kind of looks good.
Well it kind of reminds me of a tangerine, with the tangerine leaves.
So I can put this I'm doing side to side, going up just a little bit at a time so that I have my paper looks very filled in, oh I left a little spot right there.
Another way I like to do mine is to have red with yellow.
I think I'll use red with yellow on this one.
Maybe a red in the middle of the triangle around the outside.
Are you wondering how we would make a fringe?
Because I'm not planning to use the edges of this I'm only using the two middles, I think I might cut that off and then fringe it.
Before we go I'll give you an idea of what it might look like.
Ooh I touched the red and I made some orange 'cause you know that yellow and red together makes orange, little flecks of mine go off.
Let me show you what I mean about making the fringe.
Get my scissors.
I'm going to cut as carefully as I can on the fold, make the edge go all the way down.
I'm not finished coloring, but you'll get the idea just so that you can see the end of the project.
I will also cut off this one.
But then I measure and I'd put it at the end then I say oh good, it's right here.
Now, I'm gonna make a little fold so I say to myself do not cut past this little fold Mrs. Readwright or it will make all your fringe fall off.
So I'm doing the fringe and the fringe like this.
I'm going all the way up to that little skinny fold that I made right there.
I'm holding it away, and that way it will make a fringe and I'll make fringe on the other end as well.
But right now I'm just making this fringe, for one end just to show you what it will look like and make it look like Faith Ringgold's wedding windows.
Oh I think I did a really good careful job.
Then the other nice thing is that I can put that little foldy part tells me that's where the glue stick will go.
So I will put glue stick there and I will add it to the bottom of my quilt and it will be ready to go.
Boys and girls this has been such a good week learning about Faith Ringgold and her art I hope you check out one of her books and see what other things she has.
I have one where she talks about the underground railroad and there's one where she goes to her aunt's house for a party.
And we can take a look at her another time when we talk about sunflowers.
It's been a great week, I thank you very much for joining me and let's do our goodbye song.
It goes, ♪ Goodbye see you next time everyone ♪ ♪ Good bye see you next time everyone ♪ ♪ Goodbye to you ♪ ♪ Goodbye to you ♪ ♪ Goodbye to you ♪ ♪ Goodbye to me ♪ ♪ Goodbye see you next time everyone ♪ (bright guitar music) ♪ Good morning to a brand new day ♪ ♪ Time to learn and games to play ♪ ♪ Learning things is so much fun ♪ ♪ Learning is good for everyone ♪ (bright guitar music)


Support for PBS provided by:
Reading Explorers is a local public television program presented by Valley PBS