TK-340: Claude Monet
Season 3 Episode 216 | 14m 23sVideo has Closed Captions
Join Mrs. Readwright at Camp Discovery!
Transitional Kindergarten teacher, Mrs. Readwright, welcomes students back to Camp Discovery, a fun learning space packed with reading adventures & fun games!
Problems playing video? | Closed Captioning Feedback
Problems playing video? | Closed Captioning Feedback
Reading Explorers is a local public television program presented by Valley PBS
TK-340: Claude Monet
Season 3 Episode 216 | 14m 23sVideo has Closed Captions
Transitional Kindergarten teacher, Mrs. Readwright, welcomes students back to Camp Discovery, a fun learning space packed with reading adventures & fun games!
Problems playing video? | Closed Captioning Feedback
How to Watch Reading Explorers
Reading Explorers is available to stream on pbs.org and the free PBS App, available on iPhone, Apple TV, Android TV, Android smartphones, Amazon Fire TV, Amazon Fire Tablet, Roku, Samsung Smart TV, and Vizio.
Providing Support for PBS.org
Learn Moreabout PBS online sponsorshipMore from This Collection
Valley PBS and Fresno Unified School District have partnered with Golden 1 Credit Union to create Reading Explorers Lessons for grades Pre-Kindergarten through Third grade. The daily lessons will be taught by Fresno Unified School District teachers and are created to help students practice their reading skills and reinforce lessons during distance learning.
Video has Closed Captions
Valley PBS presents Reading Explorers Lessons for Pre-Kindergarten and TK. (26m 27s)
PK-TK-693-The Most Magnificent Thing
Video has Closed Captions
Valley PBS presents Reading Explorers Lessons for Pre-Kindergarten and TK. (26m 26s)

Video has Closed Captions
Valley PBS presents Reading Explorers Lessons for Pre-Kindergarten and TK. (26m 28s)
Video has Closed Captions
Valley PBS presents Reading Explorers Lessons for Pre-Kindergarten and TK. (26m 28s)
PK-TK-690: The Very Clumsy Click Beetle
Video has Closed Captions
Valley PBS presents Reading Explorers Lessons for Pre-Kindergarten and TK. (26m 22s)
PK-TK-689: What Color is the Wind?
Video has Closed Captions
Valley PBS presents Reading Explorers Lessons for Pre-Kindergarten and TK. (26m 21s)
PK-TK-688: Pocket Full of Colors
Video has Closed Captions
Valley PBS presents Reading Explorers Lessons for Pre-Kindergarten and TK. (25m 58s)
PK-TK-687: Dancing Through Fields of Colors
Video has Closed Captions
Valley PBS presents Reading Explorers Lessons for Pre-Kindergarten and TK. (26m 20s)
PK-TK-686: One World Many Colors
Video has Closed Captions
Valley PBS presents Reading Explorers Lessons for Pre-Kindergarten and TK. (27m 13s)
PK-TK-685: School is Wherever I am
Video has Closed Captions
Valley PBS presents Reading Explorers Lessons for Pre-Kindergarten and TK. (26m 32s)
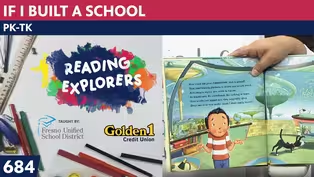
PK-TK-684: If I Built a School
Video has Closed Captions
Valley PBS presents Reading Explorers Lessons for Pre-Kindergarten and TK. (26m 21s)
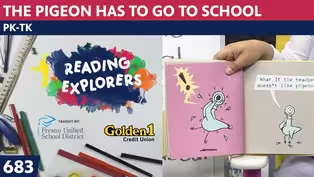
PK-TK-683: The Pigeon Has to Go to School
Video has Closed Captions
Valley PBS presents Reading Explorers Lessons for Pre-Kindergarten and TK. (26m 22s)
Providing Support for PBS.org
Learn Moreabout PBS online sponsorship♪ Good morning to a brand new day ♪ ♪ Time to learn and games to play ♪ ♪ Learning things is so much fun ♪ ♪ Learning is good for everyone ♪ (upbeat folk music) - Hello, early learners.
Welcome back to the Art room.
It's Mrs. Readwright.
Let's start off with our "Hello" song.
♪ Hello nice to see you everyone ♪ ♪ Hello nice to see you everyone ♪ ♪ Hello to you ♪ ♪ Hello to you ♪ ♪ Hello to you ♪ ♪ Hello to me ♪ ♪ Hello nice to see you everyone ♪ Now we've been talking about the "ABCs of Art" and that's what we're doing again today.
We did A, B, C, D, E, F, G, H, I.
And today is J.
And J is for "Jar" and we're meeting Claude Monet again.
Now Claude Monet was the one when did the bridge, he had that bridge in Giverny.
Remember, he had to work for 50 years before he had enough money to buy a house and that house he built the bridge and has a huge garden out there.
But today, we're talking about a jar of peaches.
And what we're going to do is do a cylinder like we did on the fish.
And we'll put a newspaper lid on it, but let's talk about the picture right now.
Here is J is for "Jar".
"These peaches in a jar painted by Monet.
We can eat them now, or another day."
Monet.
Day.
They both say "ay".
Well, Monet painted this jar of peaches and we're going to do a mixed media.
We're going to first make this granite table.
It's probably a counter and it has white swirls on it, kind of how we did our fish painting.
And then I'm going to teach you to draw the jar and we'll cut out some peaches out of peach paper and we'll glue some in the jar and maybe some outside the jar.
And remember what Claude Monet looked like?
He was well-known around his city.
He would walk around with that big beard and his big self, and then he pretty much stayed at home.
Because he had that beautiful house with the garden and out in the place where the pond was, the Japanese bridge, he just sat out there and painted.
Because once he learned to paint outdoors, that's what he did all of the time.
Let's sing our "ABCs of Art" song because it's the last day this week to do the letter J.
Ready?
♪ A B C D E of art ♪ ♪ That's the way that we will start ♪ ♪ F is for fish ♪ ♪ Golf it starts with a G ♪ ♪ H is for house now don't you see ♪ ♪ I is for insect ♪ ♪ Jar starts with J ♪ ♪ Art and the alphabet ♪ ♪ What do you say ♪ Well, what I say is, let's set this down and get our little table up here to start our process.
Boys and girls, you know when you're doing your art, I like for you to maybe ask a grown-up to take your picture and send it to me of you working on your art or send a picture of your art when it's finished.
Because if you send it to the studio, the photograph with your address, they will send you one of these great books, these activity books.
And they'll come in your mailbox, which is always fun to get mail in the mailbox.
Alrighty, I'm gonna show you the materials I have today.
I'm using my scissors.
I'll use my glue stick.
I have all this paper.
This jar that Monet did, maybe I'll bring it down here.
Monet did this jar and it has paper around the lid.
When they canned their jars of fruit, they would often put a little paper on the top and wrap it up, so it looked like a fancy place and they'd tie a string.
So this peach paper, I'm going to use for drawing my peaches.
This gray paper, I'm going to use as the background for the jar.
This black paper is the part that's going to be the table where I'm gonna blow some of the white paint around.
And this is the jar paper.
So let me set everything aside except the black paper, 'cause it's a little on the messy side.
I can still keep my scissors out, but I'm going to put this here.
You remember how we did this and I covered up my workspace with a piece of newspaper?
So that I didn't get paint all over?
So then I will get my paint brush, the fancy one that I told you I got in my set of paints.
I'll dip into my white paint and you know what we do.
We drip, drip, drip, drip, drip, drip.
Let me get a little bit more paint on it.
Some drips on it.
I'm going to make this spray across my paper, so that it will look like Monet's tabletop.
(air blowing) And what did I say if you don't have a straw?
(blows air) Just blow down on it (blows air) with your breath.
(air blowing) Does it look exactly like the picture?
Probably not, but it's the idea of it that we're doing this.
Let me set my paints aside.
I'll bring back the gray background paper, the peach colored paper and the white paper and put it all here so you can see.
Don't need this anymore.
I'll set that aside.
Now, here's my background paper and here's my table paper.
So I'm going to put,...
I can't turn it over right now, because it's wet.
So I'm going to put the glue stick around where I think it will go.
So I'm gonna see, I measure it a little bit to see... Oh, I need it to go across here, down, over and up.
Set this aside, put it on my table, try and make the bottom even with that paper.
I have to lift it up a little bit, boys and girls, so I can see that I'm getting it in the right spot.
And you know what happens if it isn't?
I just snip off the part that doesn't fit on there.
There we go.
Now, I'm going to measure how tall my jar needs to be.
And it doesn't sit on the top of the paper, it goes down a little bit.
So I'm going to see how far up I want it.
And I'm just going to cut the paper there.
And I'm going to cut it off a little bit, so that when I draw it and cut it out, you will see what I'm talking about.
Let's move this over here.
Uh oh.
I dropped my little newspaper top.
Let me get it.
Alrighty.
Here we go.
Now, who remembers what happens with the cylinder?
It's flattened oval, so I'll do that.
And I'm doing it right side up so you can see it.
I don't know if that's big enough.
I'm gonna do it back here to make it a little bigger.
There we go.
Now on the jar that they have, it goes down a little bit.
Two little curve lines.
So you can do that.
I'm going to do my straight line down.
Don't go all the way to the bottom, because remember, we have to make it a curved line.
There it is.
Now in order for my jar to have this kind of lid, I'm going to put it behind my paper as I cut it out.
Cut out as close to the line as I can.
Remember, the bottom was a little curve.
Cutting up there.
Going up the straight line.
Getting to the top with the little curve, up the neck and around that oval.
Oh, and look, there's my newspaper.
I'm gonna make it a little wiggly.
Just like it is in the Monet picture.
Wiggle, wiggle, wiggle and wiggle.
Now I'm going to put glue stick on the jar so I can put that newspaper around the top.
If you don't have newspaper or you don't think that that's what you want to do, don't do it.
This art is to make you happy.
So I'm gonna put this on my jar.
And remember I told you they tied a little string around there?
I'm gonna use one of my colored pencils and draw the string right on the skinniest part.
I'm gonna put it here so you can see.
See that little skinny part in?
I'm going to make this little part like this and tie the string on it.
There we go.
I like that pretty much.
Okay, I'm going to also use a little gray, because when we talked about what makes things look realistic is when it's shaded.
So I'm going to go next to the jar and just make some little curve lines that make it look like the jar is a real jar.
And I just make this little part in and I make it a little curvy, because this jar is a little curvy.
And I might just go down here a little gray, because it will be on gray paper, but at the bottom, I want a lot.
There.
So I'll be putting that on here.
I can see that I didn't make my paper.
I think I might even cut my paper off a little bit and make it skinny later.
But right now, I'm going to cut out my peaches.
So how I'm going to do that?
The peaches are really kind of oval-y shaped and it has a little bump in it.
Now, every peach isn't the same.
That's why I'm not folding my paper to make them all the same, but I might make a few the same and you'll see.
Because I think, "Is that big enough for this jar?
Oh, that works good."
So if I fold under the part where I just drew, maybe I'll make three that size.
So I can go in and make it.
It's kind of like a heart at the top or maybe it starts out like a number three.
Now about making your peaches look realistic, let me move my scraps up here.
I'm going to get some of my colored pencils to shade the edges.
So here are three of my peaches and in order for them to look like real peaches, I'm going to go around the edge with the side of my pencil and going in and making that look like a peach.
And some of it has like a little brown part where like maybe the stem is, so I'll put a little brown there too.
And maybe a little brown on that part.
Now I can glue this into my jar right away so I don't lose it.
I'm gonna put some of them side to side and some of them all stand up, but you can see what you think the peach looks best.
And I like to arrange and rearrange sometimes, boys and girls, but you know how I like to show you exactly what I'm talking about.
So that's why I'm gluing it on right now.
Because when we're finished, I don't want you to not have seen how I put this on here.
And I might even put a little orange on the middle of this.
Well, get this peach on here.
Some of my peaches might go right side up, some upside down.
Some will be closer to the edge of the jar, some will not.
Think I'm gonna glue my jar on, so I don't lose it.
'Cause when I clean up when it says "Time to say goodbye", I want to make sure I keep track of it.
So boys and girls, I'll show you when I cut this, I'm gonna cut part of my paper off.
But I want you to see how it's going to be centered on here.
I think it looks better on a smaller piece of paper.
Don't you?
All right, let's sing goodbye to each other and just tell you that next week, we'll be finishing up the next five letters of the alphabet.
So here it goes!
♪ Goodbye nice to see you everyone ♪ ♪ Goodbye nice to see you everyone ♪ Oh, it doesn't say that.
It says, "See you next time."
♪ Goodbye see you next time everyone ♪ ♪ Goodbye see you next time everyone ♪ ♪ Goodbye to you ♪ ♪ Goodbye to you ♪ ♪ Goodbye to you ♪ ♪ Goodbye to me ♪ ♪ Goodbye see you next time everyone ♪ So if we end with J, we'll do K, L, M, N, O.
See you next time.
♪ Good morning to a brand new day ♪ ♪ Time to learn and games to play ♪ ♪ Learning things is so much fun ♪ ♪ Learning is good for everyone ♪


Support for PBS provided by:
Reading Explorers is a local public television program presented by Valley PBS