The Best of the Joy of Painting with Bob Ross
Waves of Wonder
Season 38 Episode 3847 | 27m 14sVideo has Closed Captions
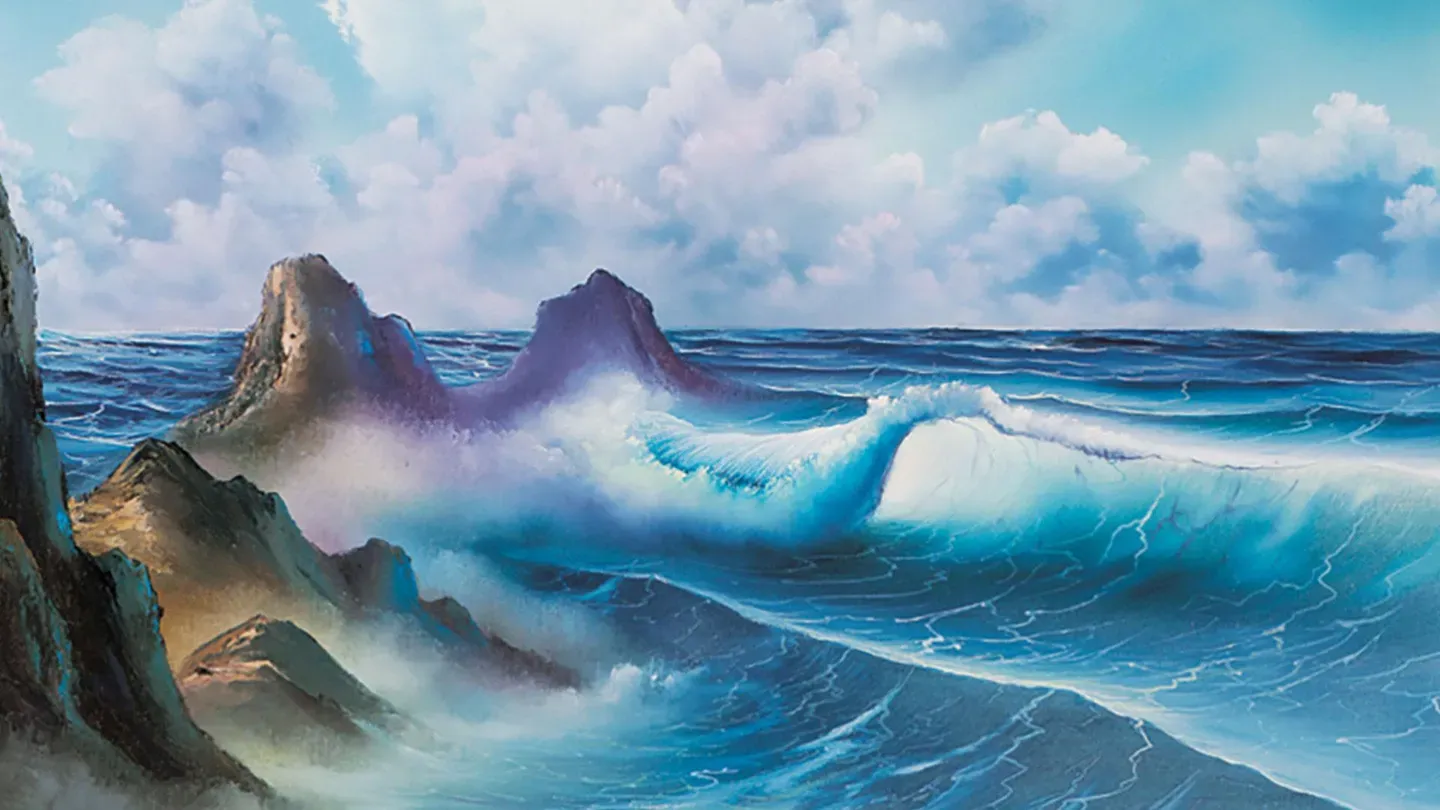
Bob Ross’ easy method is illustrated with waves crashing into a rock-lined shore.
The versatility of Bob Ross’ easy method is dramatically illustrated with waves crashing into a rock-lined shore.
Problems with Closed Captions? Closed Captioning Feedback
Problems with Closed Captions? Closed Captioning Feedback
Distributed nationally by American Public Television
The Best of the Joy of Painting with Bob Ross
Waves of Wonder
Season 38 Episode 3847 | 27m 14sVideo has Closed Captions
The versatility of Bob Ross’ easy method is dramatically illustrated with waves crashing into a rock-lined shore.
Problems with Closed Captions? Closed Captioning Feedback
How to Watch The Best of the Joy of Painting with Bob Ross
The Best of the Joy of Painting with Bob Ross is available to stream on pbs.org and the free PBS App, available on iPhone, Apple TV, Android TV, Android smartphones, Amazon Fire TV, Amazon Fire Tablet, Roku, Samsung Smart TV, and Vizio.
Providing Support for PBS.org
Learn Moreabout PBS online sponsorship[Music] Hi, welcome back.
I'm glad you joined me today because today we're going to do a fantastic little seascape, and I think you'll like that.
Let me tell you what I've already done up here.
I have my standard old canvas up here, and I've covered the top of it with just liquid white, just like we normally do.
Then, I have a piece of masking tape, and this is slightly above the center, slightly above center, and then the bottom of this I've covered with liquid clear, and I just have a thin even coat.
So, tell you what, let's have them run all the colors across the screen that you need to paint along, and we'll go on up here and get started.
Now, let's start to today with a small amount of the phthalo blue.
Smallest little amount.
Just a tiny bit.
Okay, let's just go up in here, and let's just drop us in a happy little sky.
Just a quick little sky.
Now, when you're putting this liquid clear on, like we have on the bottom, use it very, very sparingly.
Because you can't see it you have a tendency to, to put too much on.
You need very, very little of it.
Oh, son of a gun, one, one can of it might last you years and years and years.
There we go.
I have a big old cloud up in the sky, so we'll just leave a spot open for it.
Okay, then we'll just blend that out a little.
About like so.
Now, same old brush, I'll take some more phthalo blue, reach up here and grab a touch of the alizarin crimson.
So we have phthalo blue and alizarin crimson, and just mix it on the brush.
I'm just looking for sort of a lavender color.
Maybe, in our sky, today, there's a big old cloud.
Just use the corner of the brush, see, just, just tap you in the back of the cloud here, putting in some shadow.
See, just drop them in, wherever you want them.
Maybe, right on down, I don't know.
You be the judge of where you want clouds to be.
Maybe it comes right on down in here somewhere.
Okay, that's all there is to it.
All we're doing is putting in some dark shapes, so when we put light on it, it'll stand out and sparkle for you.
Let's bend this one over a little, there.
See, make him tilt over a little bit.
[chuckles] You can just do anything that you want to do.
It's your cloud.
Clean my brush here.
Give it a shake, and we're in business.
Okay, I'm going to go right into titanium white.
Still use old two inch brush, what the heck.
Now, when you're doing this at home, maybe you want to use your fan brush to do it if you want very delicate little clouds or a one inch brush, or you can get brave and just use this big son of a gun.
It doesn't matter.
There we go.
Just put them rascals on there.
I want big fluffy cloud that just lives out here and has a good time.
Maybe, there.
Okay.
Just wherever you think they should be.
Maybe there's a little bit of it that floats right over here.
Wherever.
Wherever.
Look at that.
See, this big old brush will make beautiful clouds, if you just give it a chance.
But I'm using just the corner of the brush.
There we are.
Okay, we'll wash that rascal again.
If you've painted with me before, you know I use odorless thinner to clean the brush.
[chuckles] If you don't use odorless thinner, I guarantee you, you're going to be working alone, and you're going to be the most unpopular person in the house.
Now, just use just the top corner of the brush and begin mixing this, blending it.
And I'm going to beat the brush, occasionally, just to knock off excess paint that I pick up.
There.
Just begin blending it together.
And just by beating the brush, you don't have to go through the whole cleaning procedure.
Just give it a good, hard whonk there.
Knock it a good one.
Okay, now I'm going to fluff this cloud a little.
[Bob makes "whoom" sound] Got to make those little noises.
There, just fluff it up.
Like so, give that, give it another beat and a bang and a...
There we are.
Sort of looks like a A-bomb went of there, don't it?
So, now if you ever want to paint [chuckles] big explosion, big bomb, you know how to do it.
We both learned something.
There.
Now, very lightly, very lightly, just want to go right across that, and just blend it.
Very softly.
Three hairs and some air.
That's all it takes.
Okay.
Knock of that excess paint.
Now, then, as I mentioned earlier, there's a piece of masking tape across here.
I have that on there only to give us a beautiful, straight horizon line.
So, let's take that off.
[Bob makes "ssssssoo" sound] And that's the fun part is pulling that off.
Now, then, we can go up here and begin playing a little bit.
Might take a clean dry brush and put the least little touch of the liquid clear right up to the horizon.
When you're using this clear, one of the neatest things, try this at home, take clear and liquid white, mix it together in about equal proportions, and then put it on your canvas.
Makes some of the most beautiful effects you've ever seen.
You'll like it, you'll like it.
Now then, I'm going to take a just a little liner br- or filbert brush, I'm sorry, a little filbert brush here, put a little color on it.
I like to sort of lay out a basic idea when I'm going to do little seascapes because I want to keep the eye of this wave transparent.
So, come right up here and watch.
Let's just go, [Bob makes "sssoo" sound] there'll be our, our major wave.
It'll come right along in there somewhere.
It'll curl over, does that sort of help?
Like so.
And, maybe, we'll have some stones in here.
I don't know, somewhere in here, we'll have some stones.
See, it doesn't matter.
You can do anything you want to do there.
The only thing I'm worried about saving is this nice place where the eye of our wave will be.
I want to keep that nice and clean and sparkly.
Let's get a little, a little bit of phthalo blue, be right back.
Grab some alizarin crimson, phthalo blue, okay.
Now then, just going to put a little touch of color right up in here, maybe a touch more of the crimson.
There, just, this is just background color.
There we go.
See, right up to the horizon.
There.
And roughly down to where we're going to have ... We're really not committed.
So, it's not a big deal.
That's the only part I'm trying to save is right there.
Rest of it, wherever.
Okay.
And right on over here somewhere.
Okay, add a little phthalo green to my brush here.
Maybe, when it gets down in here, we're going to have a little touch of green.
I'm going to add some black to that.
Very dark.
Black, phthalo blue, phthalo green, we'll let that blend right on up.
Just looking for a super, super dark color.
There we go.
Something about like so.
Okay.
Now then, I'm going to grab another brush.
Maybe, there'll be a little sand over here.
So, I'm going to go into the Van Dyke brown, a little dark sienna, just mix them up a little bit on the brush.
Maybe there's a little sand, lives right over here in the corner.
And all we're doing is just blocking in color.
Add a little touch of yellow ochre to that.
A little touch of yellow ochre as it gets down here.
There, just sort of let them blend together.
No big deal right now.
Once again, all we're doing is blocking in color.
We can come back and do anything that we want to do.
Okay.
Clean our brush, give it a nice scrub.
[chuckles] And beat the devil out of it.
Okay, now we can start playing back here.
Grab a fan brush, go into a little bit of white, and we can make our first big decision.
Looking for some waves back here in the background.
There's one.
Just straight white, that's all it is.
There's another one that lives right back in here.
Just straight white.
A little bit of white right along this major one.
[Bob makes "ssshhhoo" sound] Now, all we want to do, is gently, blend this back.
Allow it to pick up that color that's back here.
Just blend it back.
Okay, grab the next one, and blend him back.
Wipe all the excess paint off your brush, and just use the paint you have on the canvas, and blend back.
See, what happens, it's these dark edges that are important, not the light ones, and you begin getting all those beautiful little wave shapes in there.
And we can just put a little of the white on the brush here and just put the indication of some little things that are happening way back in there.
[Bob makes "zooom" sound] Just make little, little wave shapes.
Just here and there.
Like so.
Okay.
Let's get a filbert here.
Right in this area, I want to have some fun.
So, we'll take some straight titanium white and to that I'm going to add the smallest little touch of cad yellow, very little color in there.
Load the bristles full of paint.
Now, let's go right right up in here.
If this is where the eye of the wave is going to be or the transparency, then just scrub it in.
Get tough with it, get tough with it.
Really scrub it in.
Now then, we begin picking up some of this color, just let it blend out darker and darker.
While I have that on the brush, maybe some of it comes down into here.
See, let all kinds of little things just happen.
Bring them sort of back and forth a little.
Now we can wash that brush.
Okay, now we have a good dry two inch brush.
I'm going to use just the top corner.
And very lightly, very lightly, make tiny little circles here, and we can begin blending all that together.
Tiniest little circles, just barely, barely touching the canvas, and just sort of wind it up, [Bob makes "rur, rur, rur, rur" sounds] see there?
And now we can begin creating some shape.
Just pull those colors together.
Mm, that's pretty already.
Now, shapes, there we go.
Okay, now we want that water to crash over.
So, I'll just take some white on the brush, and, well, let's see here.
Let me find another brush.
I've got two or three of them going here.
We need a little more dark, right in here.
There we are.
We've got to have plenty of dark in there, so our light will show.
Now we can take our...
This is just titanium white.
I'm going to grab it, give it a pull.
[Bob makes "shoo" sound] Let it curl over, think about that wave crashing over the top here.
Grab it.
[Bob makes "tchoo" sound] Helps to make those little noises.
[Bob makes "tchoom" sound] There you go.
Okay, now maybe, I said there was going to be some stones.
I'm going to take some, oh, let's go right in here, have some Van Dyke brown, dark sienna mixed together, and right here, I'm going to mix up blue and alizarin crimson, proportionally much more crimson.
Take a little of each, and maybe our stone lives right up in here.
Now, push it in very firmly.
Now we're just going to start blending this together.
All I'm doing is bending that knife.
I have the small knife.
Pushing very firmly, and begin blending this together.
Let it pick up some of this white.
I want this to be very soft, very subdued.
A little more white and just blend.
See what's happening?
Put a lot of pressure, really a lot of pressure.
Wipe your knife continually.
And just make it look so soft.
Maybe this wave comes right in front of it.
You have to make a big decision.
Okay.
We'll take a little blue, a little blue, crimson, a touch of white.
Let's put a... Let's go right in here, and let's start putting the foam in here.
That's the fun part.
Just think about that foam crashing and carrying on in there.
[Bob makes "tchoo" sound] Helps to make all these little noises.
Okay, now we have to clean the brush, and just wipe it on some paper towels here.
Okay, and we go right back into, this is white with just the least little touch of the cad yellow, least little touch.
Load a lot of color into the brush.
Now then, let's start right up here.
Just give it a little upward push.
Create that nice foam.
There.
Wipe your brush off in between loading, so you have nice, fresh color on it.
Let that foam fall just right around here.
Think about how the water's going to crash and churn and carry on.
All the little things that are going on.
Mm.
Water really it's, boy it's having a good time out here.
Now then.
I'm wiping all the paint off the brush, and very gently, just going to blend these back together.
Get all the paint off the brush that you can get off, just rub it clean.
Our two inch brush and very lightly, once again, just blend that together.
Comes out so soft and delicate looking.
People never believe you done that with a great big brush.
Now, I'm going to take the liner brush.
Go into some of that lavender here.
And I want to strengthen this edge, so it really stands out.
There we go.
Really strengthen it here.
A little bit of that color on it.
Begin putting some little things in your wave.
These little things help show the shape.
There.
Okay, now then, let's go back to our small knife.
Well, I'll tell you what.
Tell you what.
Let's have an opening between these stones.
That always looks neat.
Come right in here, and you need a few little things happening.
We're not too worried about this.
Most of it's going to be covered up.
Maybe a little of it will show through, and we have a little bit of action going on back there.
Need a little action.
Go back into our lavender and brown mixture.
Maybe, come right up here, maybe there's another stone.
There he is.
There's not a great deal of color on here.
Not a great deal of color.
Really push firmly.
There, just really push it in.
And that's shaping your rocks.
Take off all that excess paint.
Mm, just all types of little beautiful things happening there.
And at home, you have unlimited time, and you can just make, oh, layer after layer of beautiful stone after beautiful stone out here.
But this little knife is really ideal for this.
Okay, maybe, in our world here there's a little touch of highlight that just zings right on down on that rock, there it is.
See there?
Now then, just grab the edges of that, maybe, and blend it back a little.
It's a mean looking rock, isn't it?
Take a little touch of blue and white, and let's just put a little of that right in here.
There.
Okay, a little bit of straight white.
See, and just by making these little circles here, you can create all kinds of foam and mist that's building and churning down here.
Look at that.
And you can do it.
You can do it.
Firm pressure, bend that knife.
Bend it.
You can do entire seascapes with this little knife.
It's very, very good for seascapes.
Okay.
I'm going to find my old fan brush again.
Maybe there's, right in here, [Bob makes "swoo, swoo" sounds] That's another little doer that lives right there.
Wherever you want him.
Put a little trough right in there.
Just very gently blend it together.
This liquid clear is fantastic for seascapes.
It's one of the nicest things ever invented.
It works so well.
See that, how that, there's a trough right in there though that flows for you.
Okay.
There it is, lost my knife for a second.
Maybe there's another stone right here.
As I say, in your world, you put as many or as few stones as you want.
This is just a little bit of brown and some of that lavender color.
And just let it churn and mist right in there.
Isn't that pretty, though?
The way that comes together.
Okay, I'm going to take the least little touch of yellow ochre, least little touch, a little bit of white, and maybe, let's just come right out into here.
Sort of define this stone a little bit.
See that?
Such a small amount of the ochre in there.
It really, it doesn't even look like ochre.
A little touch of the blue.
And I want white.
Wipe your knife continually.
Get off any excess paint.
You can just blend all this together.
Shoot, let's have a big rock right here.
I'm getting so carried away, I need something to cover up this big opening here.
I'm going to just take some Van Dyke brown here.
Let's just bring him right off the canvas.
What the heck.
Maybe he comes right there.
Wherever, comes right down in front.
And just fill this in.
Scrape off all the excess paint.
All the excess paint.
Just really get in there and pull all of it out that you can.
Okay, and then our little knife.
I just want to blend all of this together.
Over here, I'm going to add a little bit of the phthalo blue and white.
Act as a nice shadow color.
Maybe there's a touch, right in here, a little highlight.
And you're continually wiping the knife.
There we go.
Now let's have some fun.
Maybe, maybe, maybe, in our world, maybe, the old waterline here, comes right... Push very firmly, firmly.
Like so.
And just blend that back.
See, it's unbelievable what you can do with the knife.
It will really and truly ...
Spend some time learning this son of a gun.
Make friends with it.
Make it your good friend because it will do things that you could not believe.
See, create the illusion of a little mist here.
Maybe, maybe, there's another little ripple right up here on the shore a little bit.
There.
Okay.
Now then, we need some little fun things in here.
Maybe, in here we have just all kinds of little foam things living here.
There we go.
And you can blend these until they, any, any degree of lightness, softness, harshness that you want.
Can make it very, very soft.
Now, take a little paint thinner, a little phthalo blue and white, and let's go back in here and begin putting in just some little wave indications.
And you can put in all kinds of these to really make your painting stand out.
Just all kinds of them.
And a few come across here.
And think where the light's coming.
If you have a little bright spot here, maybe this right in here is a little bit brighter.
Let them just shine.
See, maybe right along in here.
[Bob makes "shoom" sound] Okay, here's some, they come right on around.
Look at that.
See, this gives shape and form to your wave.
There.
There we go, just let your hand wiggle and jiggle and carry on.
This is where if you have a little nervous twitch, you're ahead of the game.
Boy, you've got something going.
Take advantage of it.
Here comes one.
Yep, you're right.
[Bob makes "tchoom" sound] Just let them go.
There.
But these things, as I say, this is what adds the little details that are so fantastic, and if you're out selling paintings, for example, this is what will make your painting stand out over everybody else's that's around.
So, spend some time and do some of these little things, and enjoy it.
It's a fun part of it.
Maybe even in here a few little gooders, over in here.
Something like so.
There's no end to this.
The seascapes should not be hard.
They should not be a big mystery.
I think we've come up with some ways here to do some seascapes that even if you've never painted them before, you'll have very, very good success.
I'm going to sign this one.
Take a little red, and we'll call it done.
I hope you've enjoyed it.
Show you how to use the liquid clear, and how in just a few minutes, you can do a fantastic little seascape, and from all of us here, I'd like to wish you happy painting.
God bless, and I'll see you next time.
[announcer] To order a 256 page book of 60 Joy of Painting projects or Bob's detailed 3 hour workshop DVD Call 1-800-Bob-Ross or visit BobRoss.com [music] [music]


Support for PBS provided by:
Distributed nationally by American Public Television